Broad Peak Expedition
Karakoram, Gilgit-Baltistan, Pakistan
0/5
0% of guests recommend
Duration
45 Days
Group Size
8 persons
Overview
About the Broad Peak Expedition
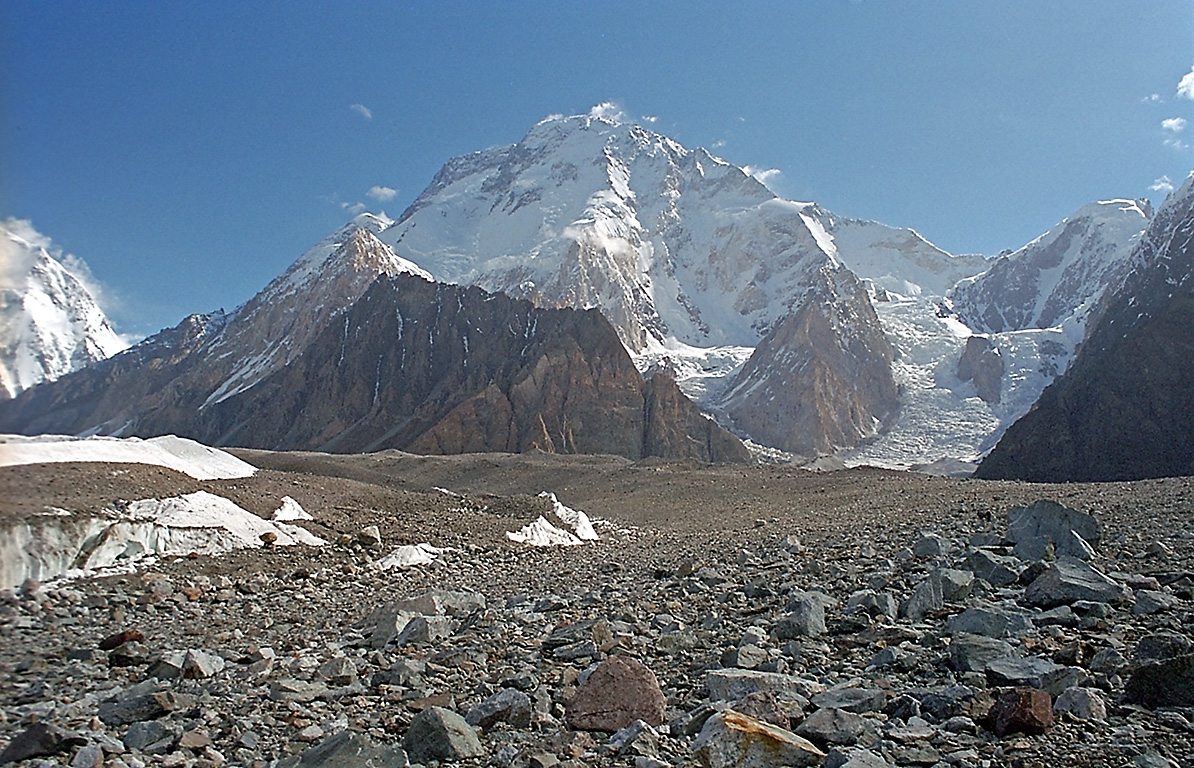
Broad Peak at 8,047 metres is the 12th highest mountain on Earth, sitting on the Pakistan-China border directly adjacent to K2 at the head of the Baltoro Glacier. The mountain takes its name from its unusually wide summit plateau, a feature that requires climbers to traverse three sub-summits (North, Central, and Main) before reaching the official summit at 8,047 metres. The normal route via the west face and northwest ridge was first climbed by an Austrian team in 1957 and remains the standard approach for guided expeditions. Broad Peak is widely considered one of the more approachable 8,000-metre peaks technically, though approachable at 8,047 metres still demands serious high-altitude climbing preparation.
The 45-day expedition begins in Islamabad with permit processing and equipment preparation, flies to Skardu, drives to Askole, and then follows the Baltoro Glacier approach to the Godwin-Austen Glacier and Broad Peak Base Camp at 4,900 metres. Two acclimatization rotations establish the three high camps before the summit push window in late July or early August.
Route Overview
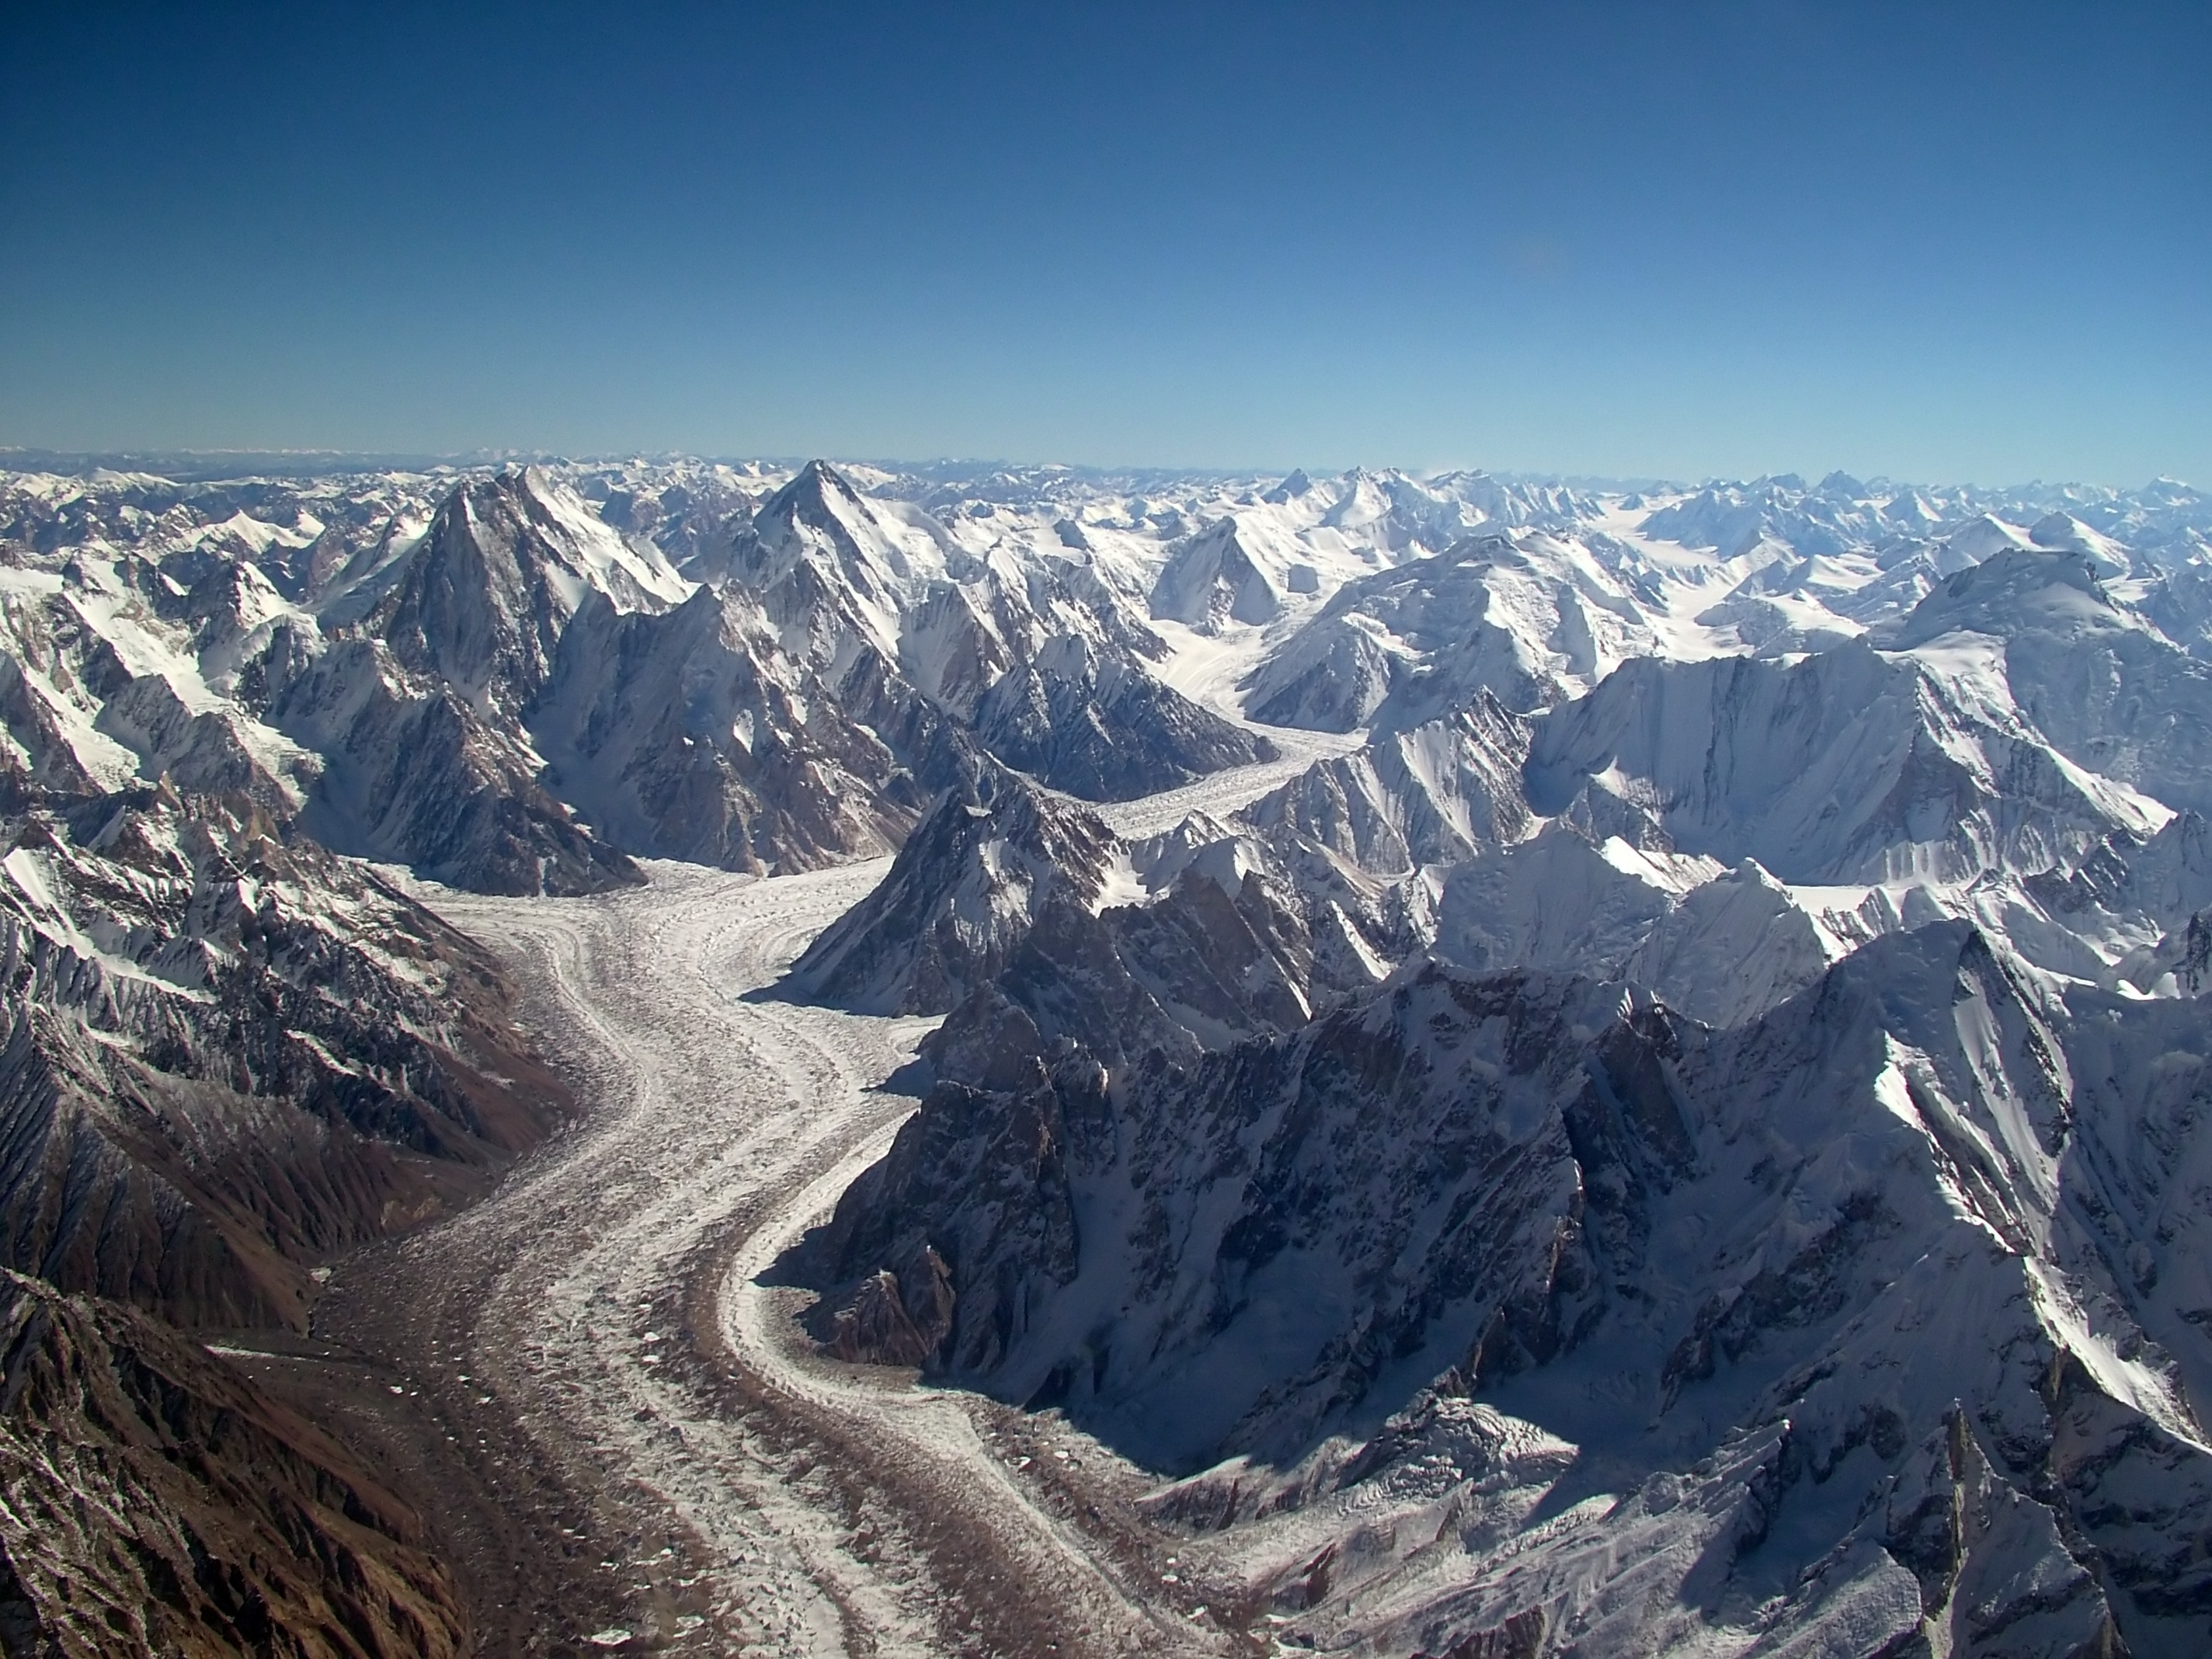
The Baltoro Glacier approach from Askole to Broad Peak Base Camp takes 7 days and is shared with K2, Gasherbrum I, and Gasherbrum II expeditions. Concordia at 4,691 metres is the approach highpoint and the finest mountain viewpoint on the approach, with K2 and Broad Peak both visible ahead as you walk northeast. Broad Peak Base Camp at 4,900 metres sits on the moraine directly below the west face with K2 filling the entire northern view. The climbing route follows the southwest face from base camp to Camp I at 5,900 metres, Camp II at 6,500 metres, and Camp III at 7,100 metres. The summit push from Camp III traverses the northwest ridge to the broad summit plateau.
Acclimatization Rotation Programme
Two full acclimatization rotations precede the summit push. The first rotation establishes Camps I and II and returns to base camp for rest. The second rotation pushes to Camp III at 7,100 metres before descending to base camp. This climb-high, sleep-low approach is the physiologically correct method for building the red blood cell count and cardiovascular adaptations required to perform at 8,000 metres. After the second rotation a full rest period at base camp builds the energy reserve for the summit push. The guide monitors blood oxygen saturation at every camp and makes all go or no-go decisions based on current health status and weather forecasts.
Best Time for the Summit Window
The Broad Peak expedition runs June through August with the summit window targeting late July to early August. This timing aligns with the established Karakoram high-pressure systems that bring the multi-day stable weather periods required for a summit push. Weather at summit altitude requires winds below 25 kilometres per hour for a safe traverse of the summit plateau. Commercial meteorological forecast services provide 72-hour and 5-day summit-level data that drives all summit timing decisions.
Difficulty and Experience Requirements
Broad Peak requires previous summit experience on at least one 7,000-metre peak and demonstrated technical proficiency on ice and mixed terrain. The west face and northwest ridge involve sustained steep snow slopes, exposed ridge sections above 6,500 metres, and the characteristic long summit plateau traverse at extreme altitude. The Death Zone above 7,000 metres means that rest at high camps does not restore the body the way sea-level rest does. Managing the cumulative physical toll of a 45-day high-altitude expedition requires both physical preparation and the psychological resilience to keep performing on day 40 of an expedition that began in Islamabad.
Summit success rates on Broad Peak across all commercial guided attempts run approximately 20 to 35 percent, with weather being the primary limiting factor. In good weather years with stable summit windows in late July and early August, success rates are considerably higher. The expedition is built to put you in the best possible physical position to take advantage of a weather window, but the window must come.
Life at Karakoram Base Camp
Broad Peak Base Camp at 4,900 metres is home for the majority of the 45-day expedition. The base camp community during the K2-area summer season is international and cosmopolitan. Teams from Korea, Italy, Spain, Pakistan, and other nations typically share the Godwin-Austen Glacier base camp area. Information sharing on weather, route conditions, and rescue coordination is normal between teams. The base camp cook prepares three substantial meals daily, with unlimited hot drinks available throughout the day. The caloric demands of high-altitude acclimatization mean that appetite management is an active expedition concern, not just a personal preference.
Why Choose Broad Peak with World of Mountain
Our Broad Peak expedition provides all K2-area permits (climbing royalty, liaison officer, PAC registration), the Baltoro approach logistics including jeeps and licensed porters, full base camp setup and cook service for 45 days, high camp tents and equipment at all three camps, fixed rope establishment from base camp to Camp III, and one dedicated high-altitude support climber per client from Camp II upward. We run small groups for a high guide-to-client ratio. Our expedition leaders have multiple Broad Peak summits and extensive K2-area experience. Supplementary oxygen is available from Camp III for all clients regardless of whether oxygen was originally planned.
Customized/Private Groups PricingDiscount will be automatically applied during the booking process if the number of guests meets the criteria specified in table below.(currently discounts are applicable to private tours only)
| Solo Price | 2 to 4 Person | 5 to 8 Person | 9 to 20 Person |
|---|---|---|---|
| $16,000 | $10,700 | $8,500 | $8,200 |
Itinerary
Day 1: Arrival in Islamabad
Altitude: 508 m | Accommodation: Hotel
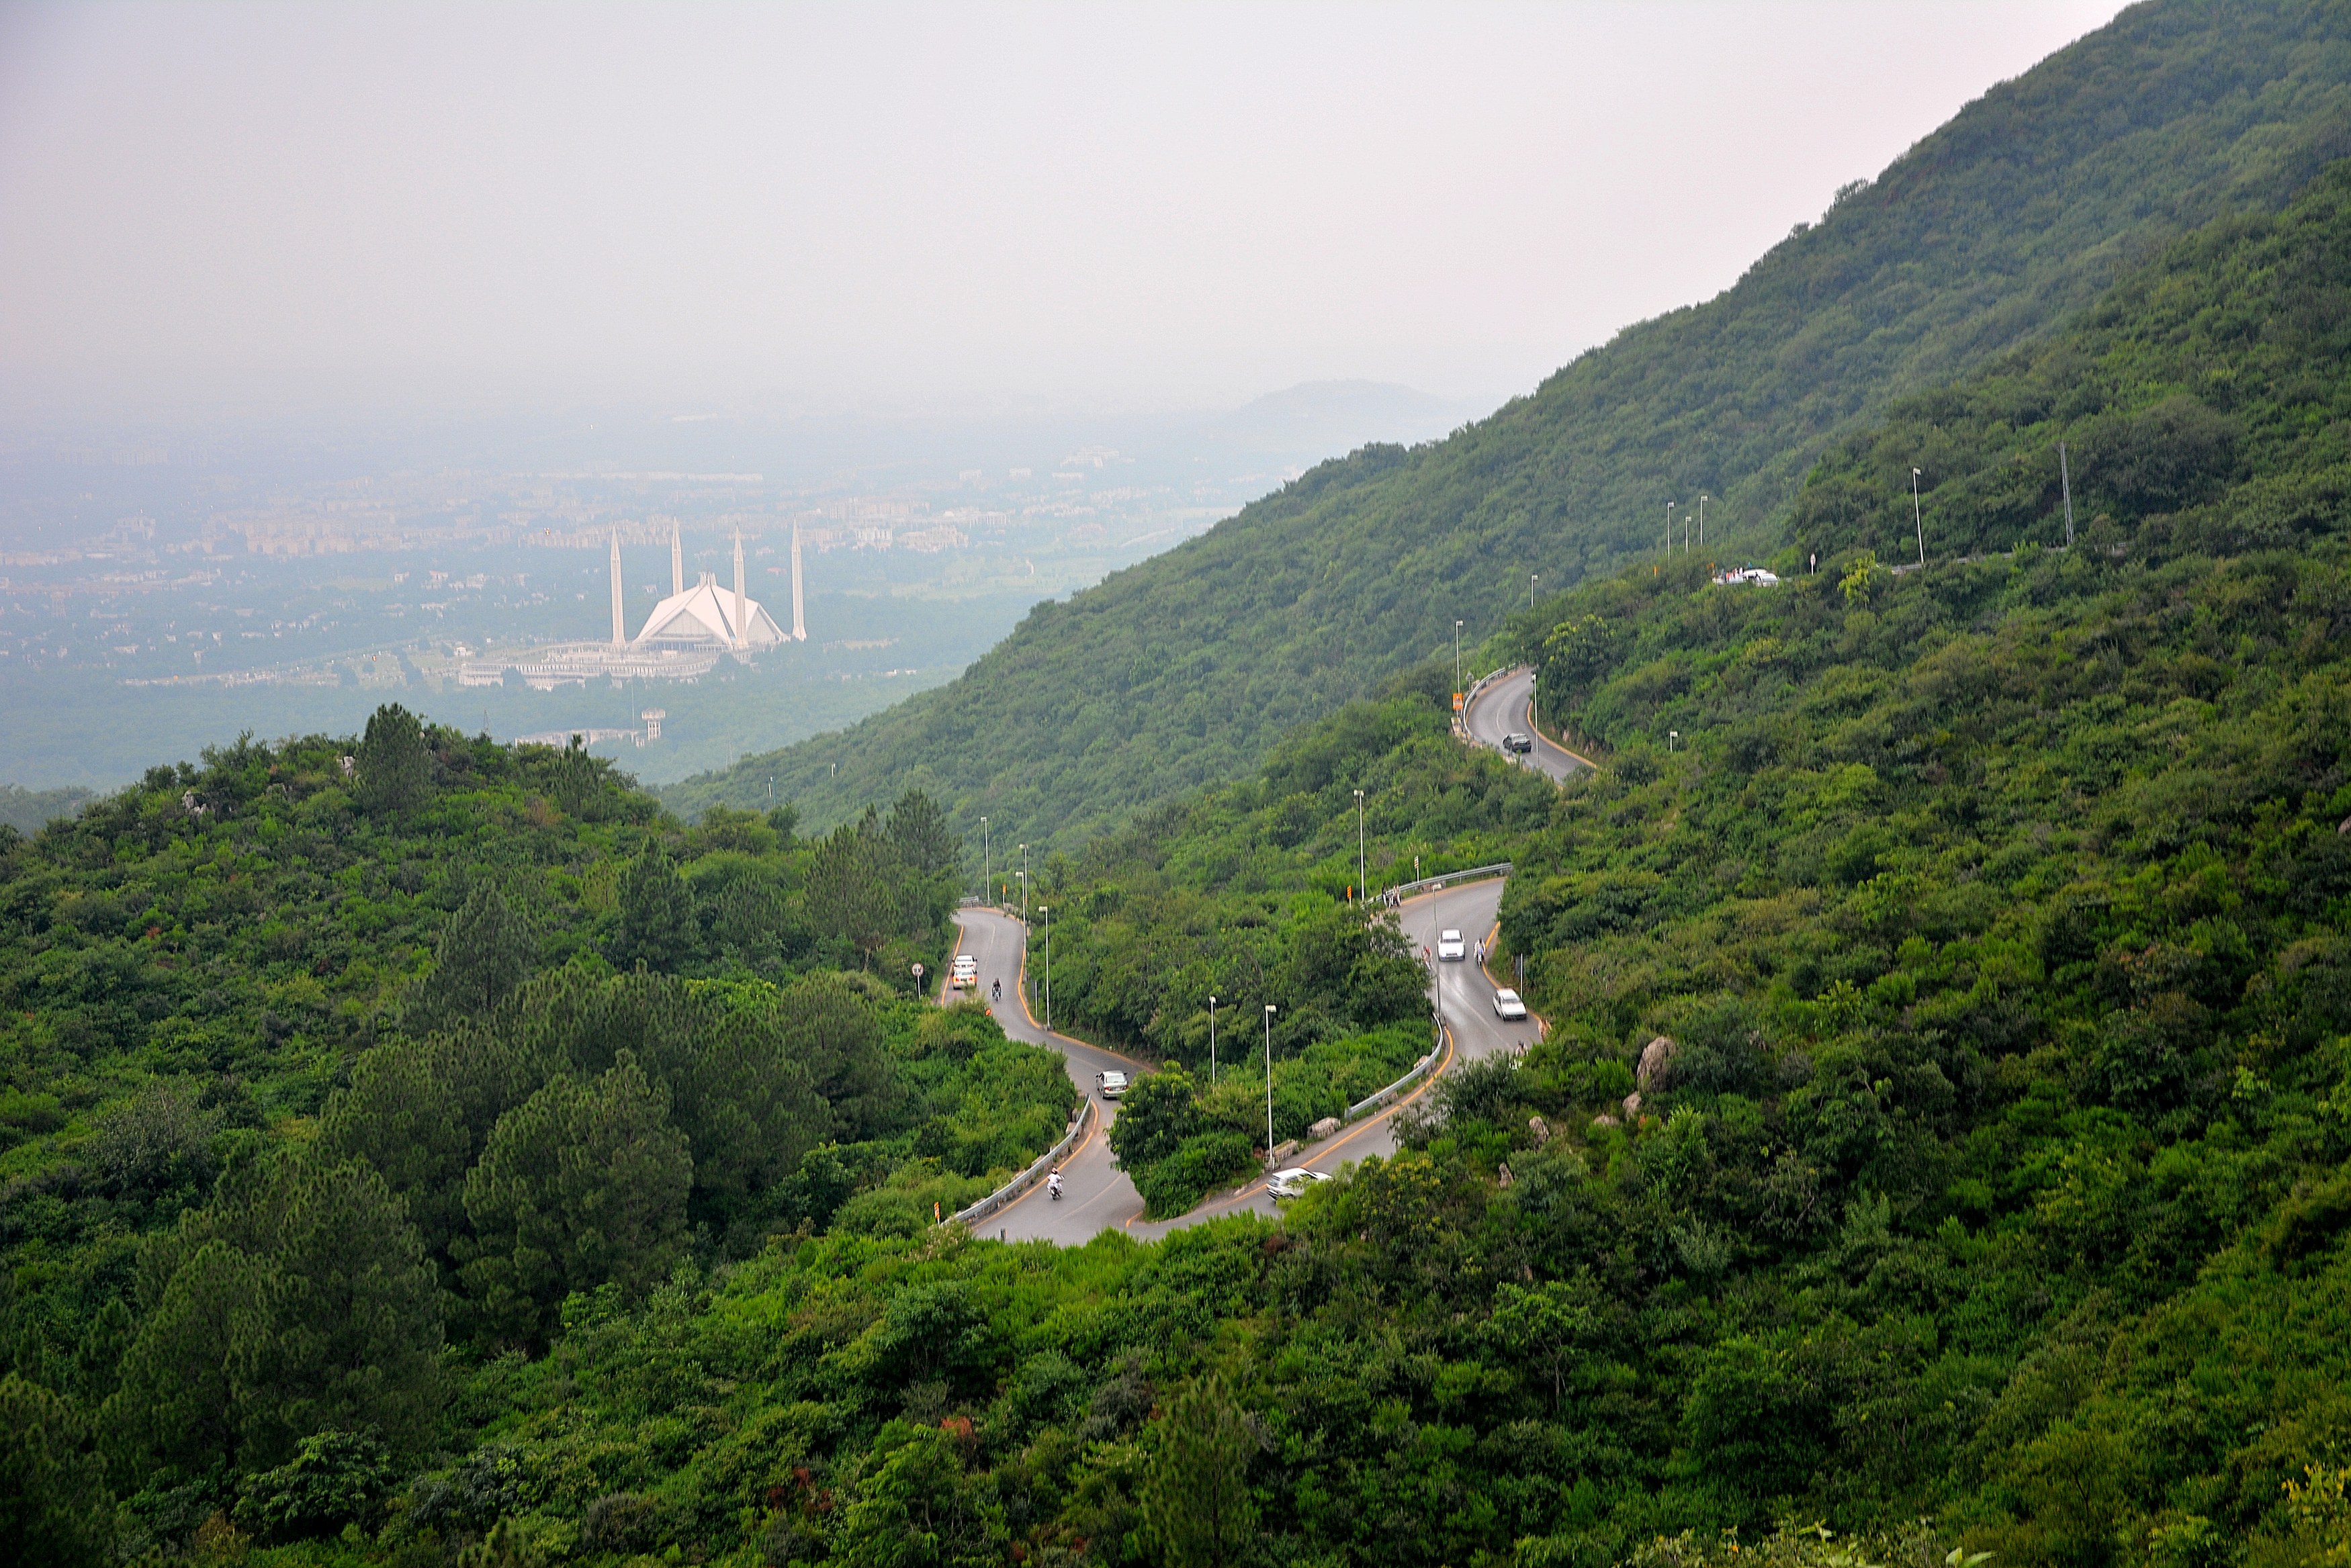
Arrive at Islamabad Benazir Bhutto International Airport and transfer to your hotel in F-6 or F-7. Your expedition leader meets you at the hotel for the initial briefing. Islamabad is the first night of a 45-day expedition that will take you to 8,047 metres on the 12th highest mountain on Earth. The city at 508 metres is the lowest point of your altitude range. Use this first evening to reset from international travel, eat a proper meal, and get as much sleep as possible before the early Skardu flight.
Expedition preparation in Islamabad spans two full days. Day 1 afternoon and Day 2 are for: Pakistan Alpine Club permit verification, equipment sorting into 25-kilogram porter loads, medical kit check by the guide or expedition doctor, final supply purchasing at Islamabad's expedition outfitters, and the team briefing covering the full 45-day programme. The liaison officer assigned by the government meets the team on day 2. All K2-area expeditions including Broad Peak require a government liaison officer who accompanies the team from Islamabad to base camp and remains on the mountain throughout the permit period.
Sleep as early as possible on Day 1. The Skardu flight departs before 7 AM and requires a 4 AM hotel departure. Confirm your gear is packed and accessible before sleeping. Keep documents, camera, and warm clothing in your carry-on bag rather than in the hold luggage.
Day 2: Islamabad - Expedition Preparation
Altitude: 508 m | Accommodation: Hotel
Fly Islamabad to Skardu: 4 AM hotel departure for the early morning Pakistan International Airlines ATR-72 flight. The 20 kilogram luggage limit is enforced. The one-hour flight northeast to Skardu is one of the finest short flights in the world in clear conditions. Nanga Parbat at 8,126 metres appears on the left side of the aircraft approximately 40 minutes after takeoff. Skardu airport at 2,228 metres above the Indus River is surrounded on three sides by Karakoram peaks. The approach and landing are unlike any other commercial airport in the world.
Transfer to the Skardu hotel. The afternoon is for acclimatization at 2,228 metres and logistics. The expedition's bulk supplies, shipped ahead from Islamabad or purchased at the Skardu market, are sorted and packaged into porter loads at the hotel yard. A typical Broad Peak expedition requires 25 to 40 porters for the Baltoro approach and the logistics of packaging 40 to 50 loads is a multi-hour operation for the sirdar and cook team. You participate if you want to understand the logistics, or rest in the hotel if you need recovery from travel. Tomorrow is a rest day before the Askole drive.
Day 3: Fly Islamabad to Skardu
Altitude: 2,228 m | Accommodation: Hotel
Full rest day in Skardu at 2,228 metres. Acclimatization at this altitude is physiologically meaningful and this day contributes to your performance above 7,000 metres a month from now. Your guide finalises permits at the Pakistan Alpine Club office and confirms the porter team numbers and porter load manifests. Use the day for a slow walk to Kharpocho Fort (150 metre gain, good acclimatization stimulus) or Satpara Lake (400 metres above Skardu, directly useful acclimatization). The Skardu bazaar has expedition-grade dried fruit, nuts, and snacks worth buying if you want personal food supplements beyond the expedition rations for high camps.
Verify your personal technical gear today: crampon fit to boots, ice axe length appropriate to your height, harness fit and buckle function, ascender (jumar) action with gloves on. These checks matter. At 7,100 metres on Camp III of Broad Peak with wind and cold, discovering your crampon bail is too small to engage your boot welt is a serious problem. Resolve all equipment issues at the Skardu hotel, not on the mountain.
Day 4: Skardu - Rest and Acclimatisation
Altitude: 2,228 m | Accommodation: Hotel
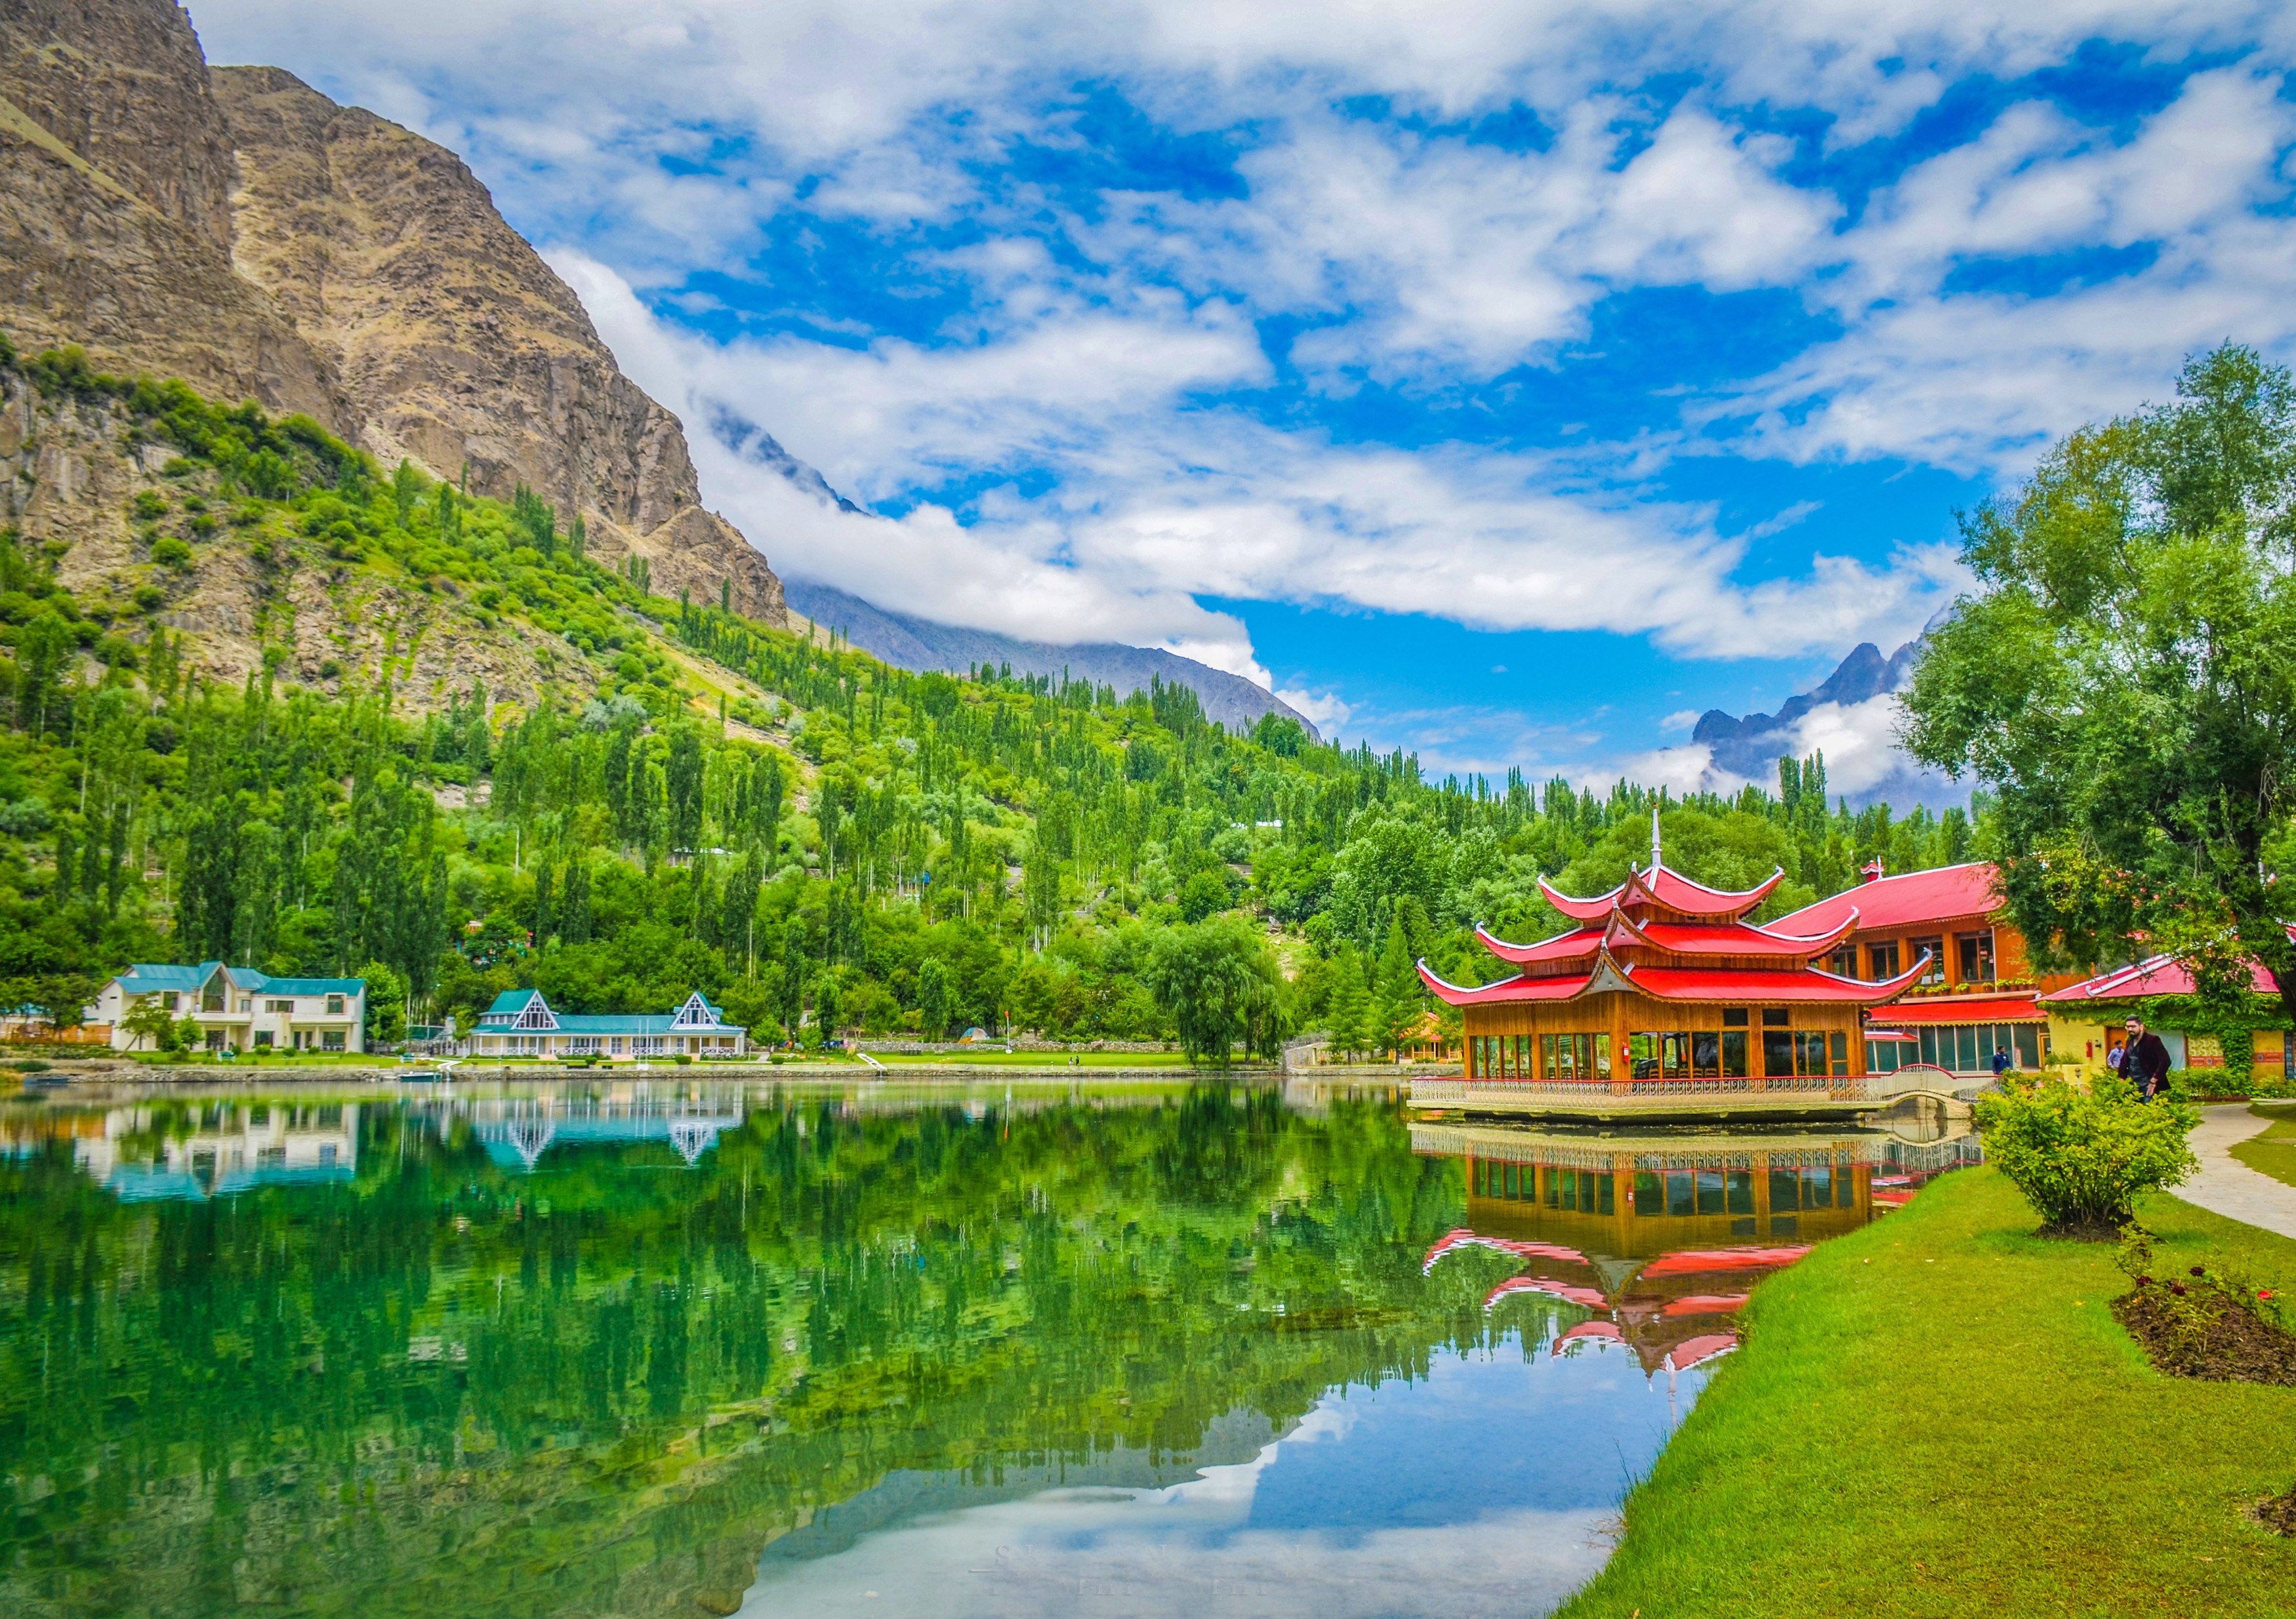
Drive Skardu to Askole: 4 to 5 hours by jeep convoy through the Braldu Valley gorge road. Departure at 7 AM. The expedition convoy may span multiple jeeps carrying clients, guides, the liaison officer, and expedition staff. The Braldu Valley road is carved into cliff faces above the emerald green Braldu River. Tea stop at Dassu village. Arrive at Askole at 3,050 metres in early afternoon. The full porter team assembles and receives load assignments. Tonight the cook team sets up the kitchen and prepares the first full camp dinner. Askole is the last permanent settlement. From here to base camp every gram is carried by human and occasionally pack animal. Whatever you forgot to buy in Skardu stays forgotten until the exit.
Day 5: Drive Skardu to Askole
Altitude: 3,015 m | Accommodation: Campsite
Day 6: Askole to Jhola Camp, 14 kilometres, 5 to 7 hours. Leave at 6:30 AM. The trail heads east from Askole above the Braldu River and reaches the terminal moraine of the Baltoro Glacier after approximately 2 hours. Cross the wire bridge over the Braldu River and begin the lateral moraine walk northeast. Moraine is rough, rocky, and demands continuous foot placement attention. There is no smooth path on the Baltoro lateral moraine. Trekking poles are essential for balance and knee protection from the first metres of the moraine. Jhola Camp at 3,170 metres is a flat sandy site reached in mid-afternoon. The sky on a clear night at Jhola is extraordinary, the Milky Way dense enough to cast faint shadows.
Day 6: Askole to Jhola Camp
Distance: 22 km | Altitude: 3,170 m | Accommodation: Campsite
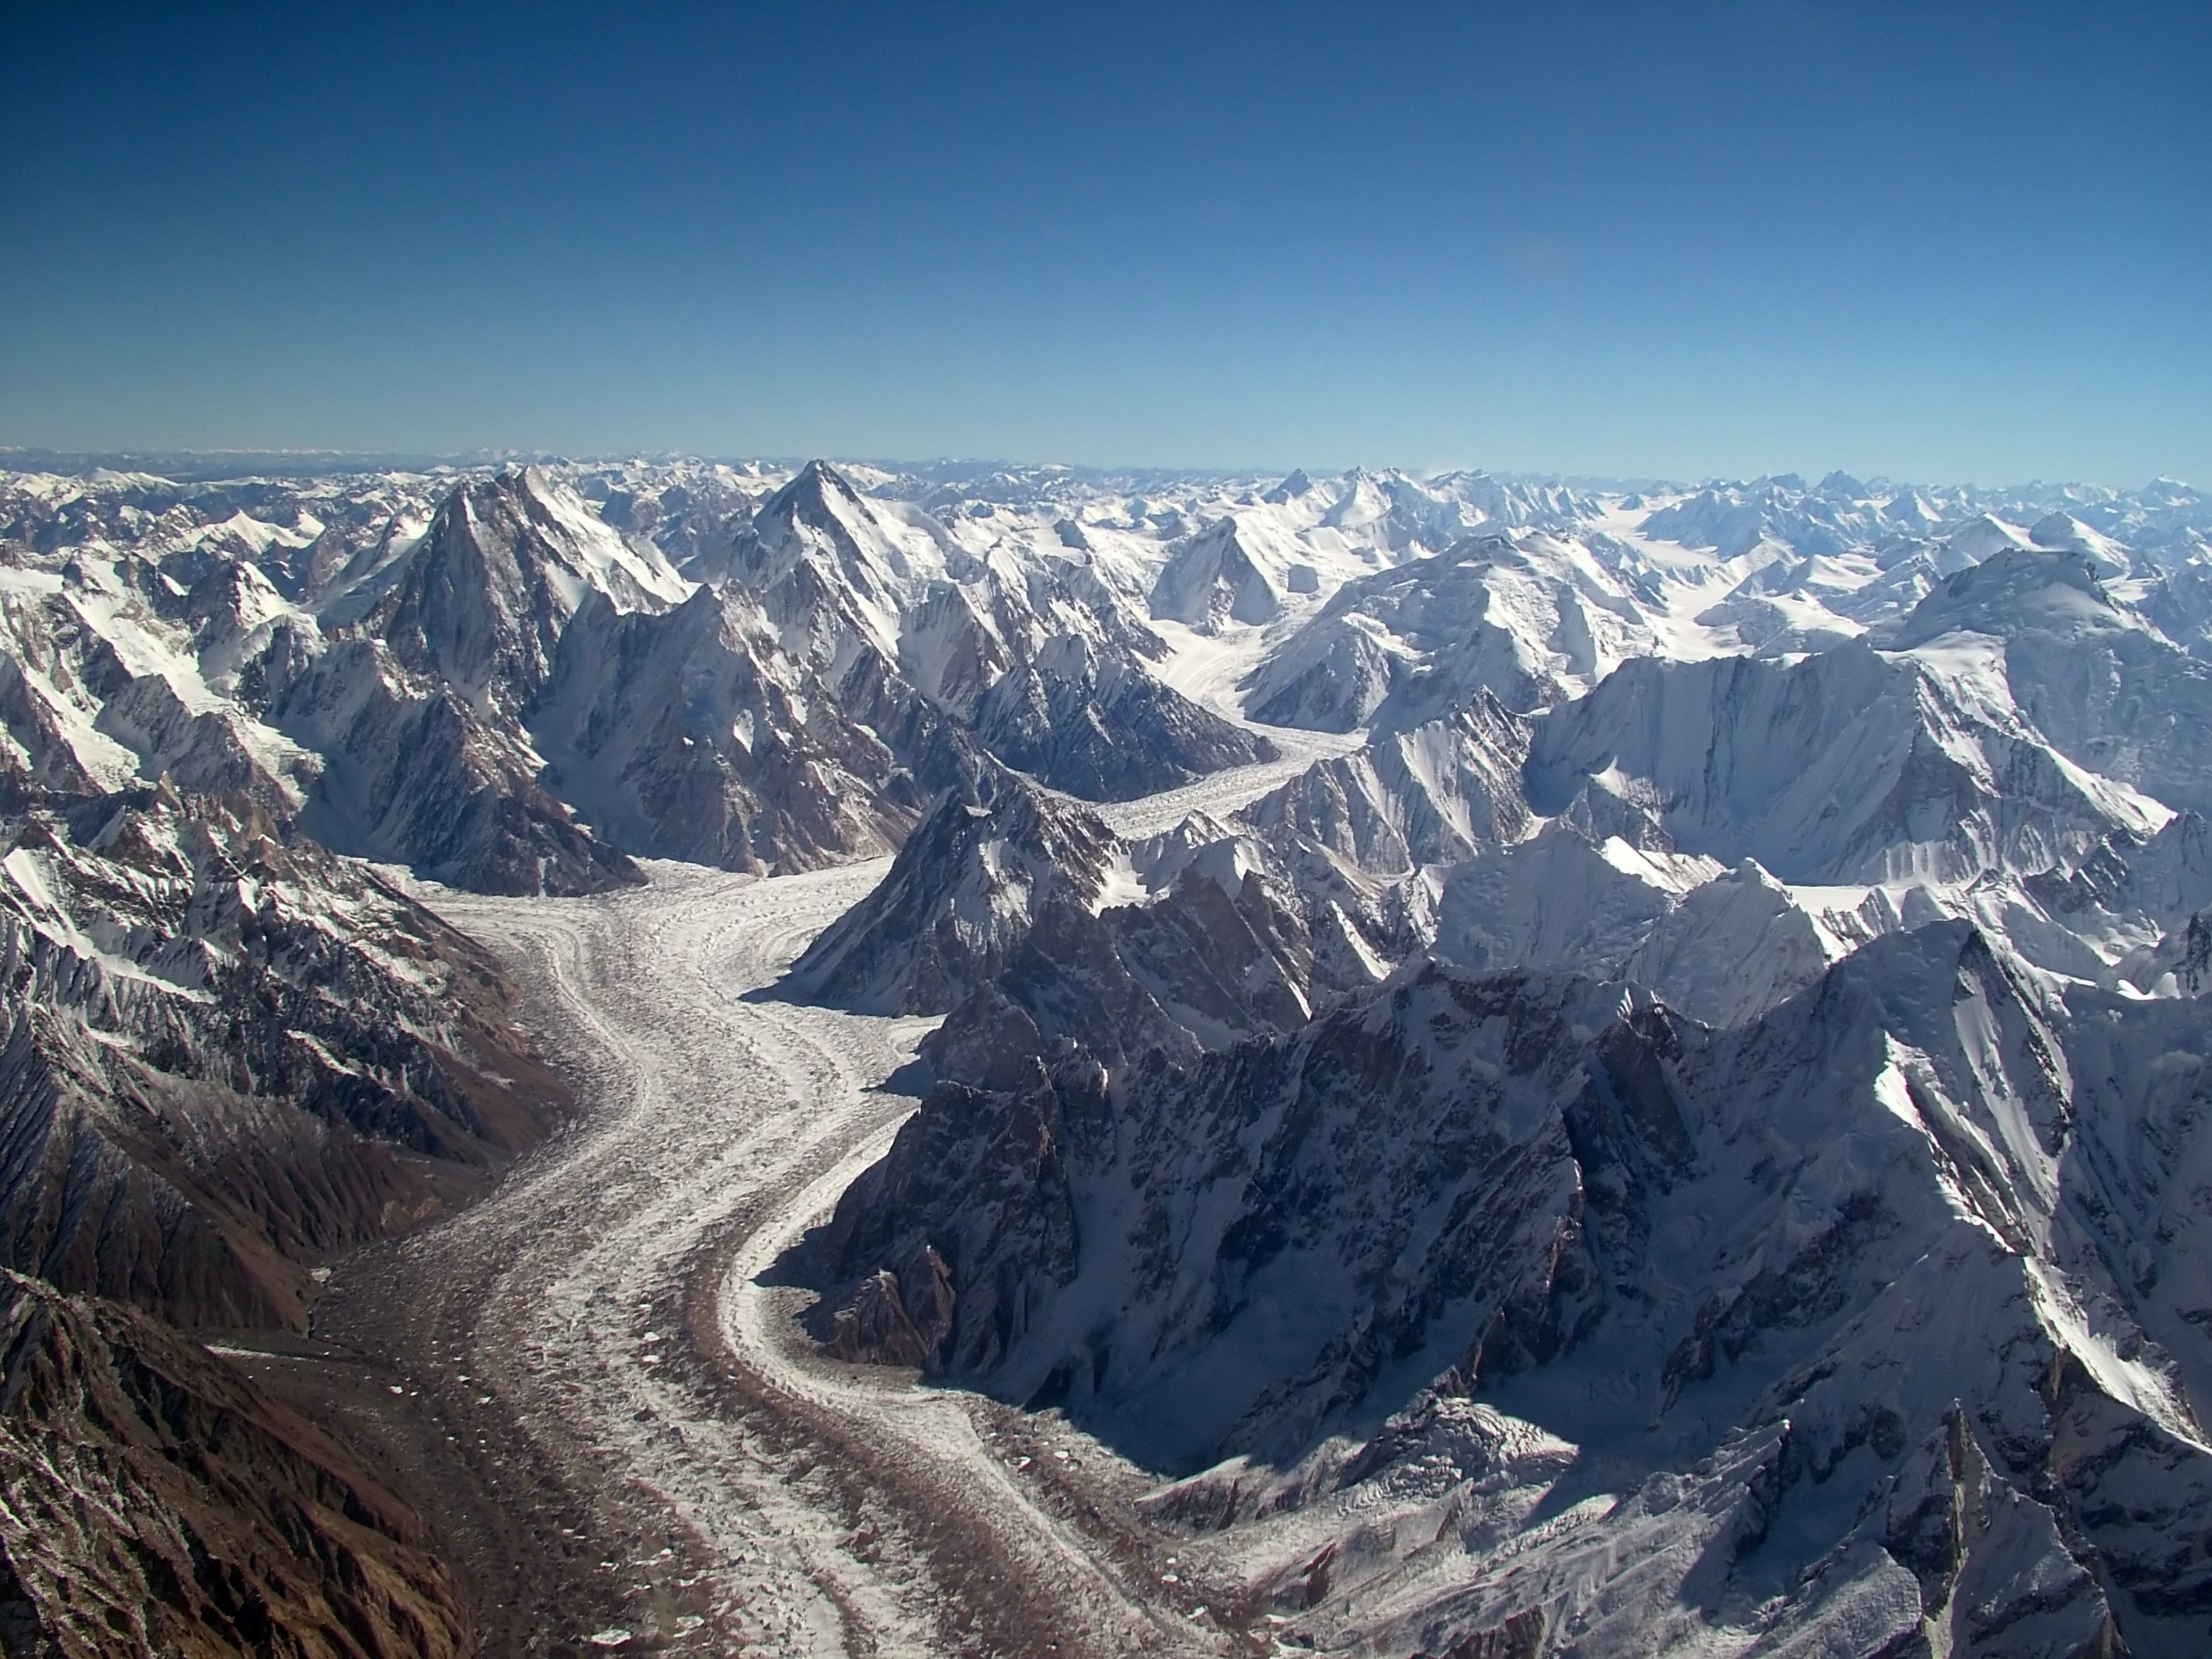
Day 7: Jhola to Paiju Camp, 11 kilometres, 5 hours. Paiju Peak at 6,610 metres dominates the view ahead during the entire approach. The peak's steep north face and sharp summit ridge grow progressively clearer as you walk northeast. Paiju Camp at 3,400 metres is the last green vegetation before Concordia and base camp. The camp sits beside a clean meltwater stream, the best drinking water on the approach. Tomorrow is a rest day at Paiju. Tonight the cook prepares one of the more generous dinners of the approach, knowing a day of rest follows.
Day 7: Jhola to Paiju Camp
Distance: 18 km | Altitude: 3,390 m | Accommodation: Campsite
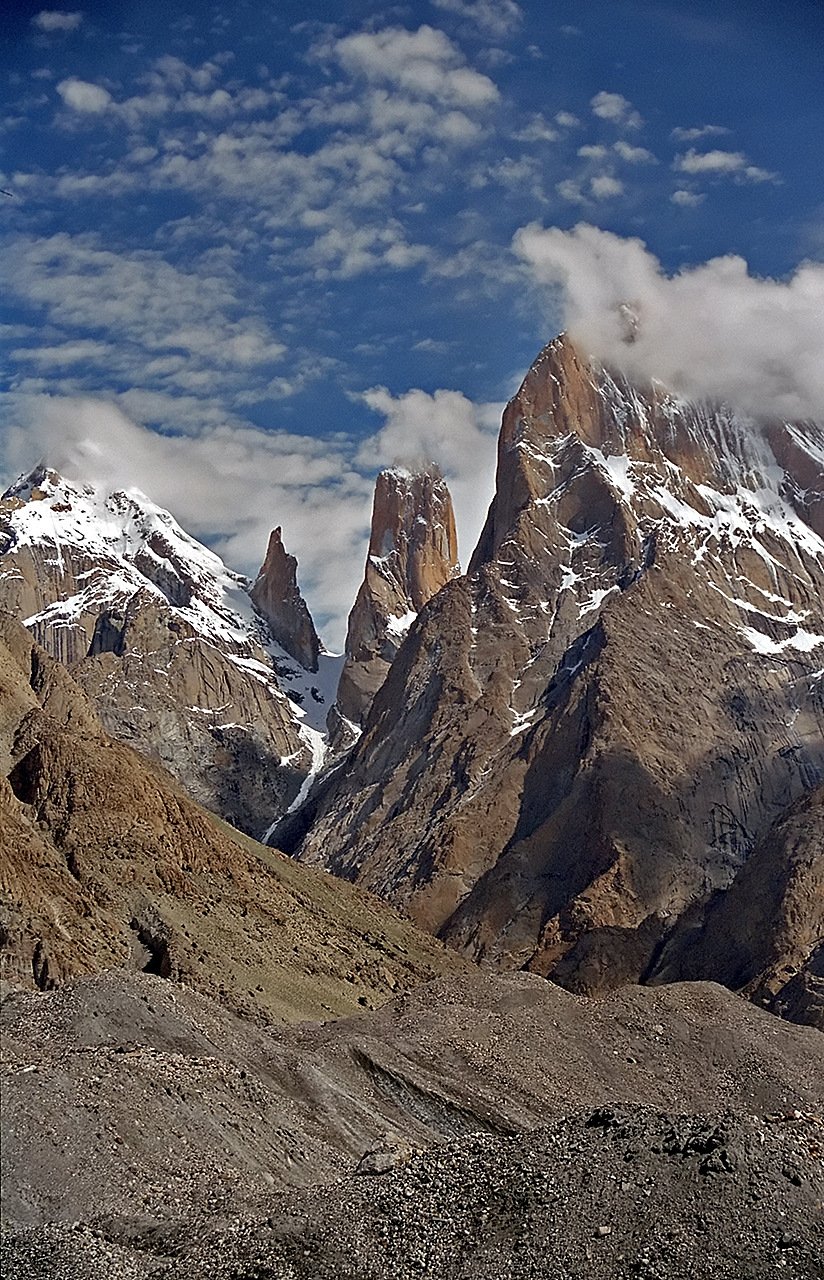
Rest day at Paiju Camp at 3,400 metres. Medically productive rest, not lost time. Sleep late, eat fully, drink a minimum of 4 litres of water. The hillside above camp has a goat trail climbing 200 to 300 metres in 45 minutes. The view from the top shows the full lower Baltoro in both directions and gives a first visual of the Trango Towers to the northeast. This short climb (the only elevation gain appropriate on a rest day) stimulates acclimatization without adding cumulative physical stress. Your guide conducts health checks individually today. Report any altitude symptoms now, not at 7,100 metres.
Day 8: Rest Day at Paiju
Altitude: 3,390 m | Accommodation: Campsite
Paiju to Urdukas: 14 kilometres, 6 to 7 hours. The Trango Towers dominate today's walk. Nameless Tower at 6,286 metres is the tallest, its 1,200-metre east face one of the largest vertical granite walls in the world. From the trail passing directly below the towers the vertical scale is overwhelming. Urdukas at 4,050 metres sits on a rocky ledge above the glacier with panoramic views in both directions. From Urdukas a faint dark pyramid is visible at the far northeast end of the glacier on clear late afternoons. That pyramid is K2. And directly to K2's right, its summit slightly lower and its profile broader and more rounded, is Broad Peak. Your mountain.
Day 9: Paiju to Urdukas
Distance: 16 km | Altitude: 4,050 m | Accommodation: Campsite
Urdukas to Goro II: 8 kilometres, 5 to 6 hours, reaching 4,270 metres. The upper Baltoro becomes increasingly ice-dominant as rock debris coverage decreases. White and blue ice shows between moraine stones. Masherbrum at 7,821 metres is the dominant southern peak on this section, its near-perfect pyramid profile matching the dramatic names in the Karakoram inventory. Goro II at 4,270 metres is the last camp before Concordia. Many trekkers and climbers experience their first real altitude symptoms here. Mild headache is normal. Report anything beyond mild headache to your guide before sleeping.
Day 10: Urdukas to Goro II
Distance: 17 km | Altitude: 4,270 m | Accommodation: Campsite
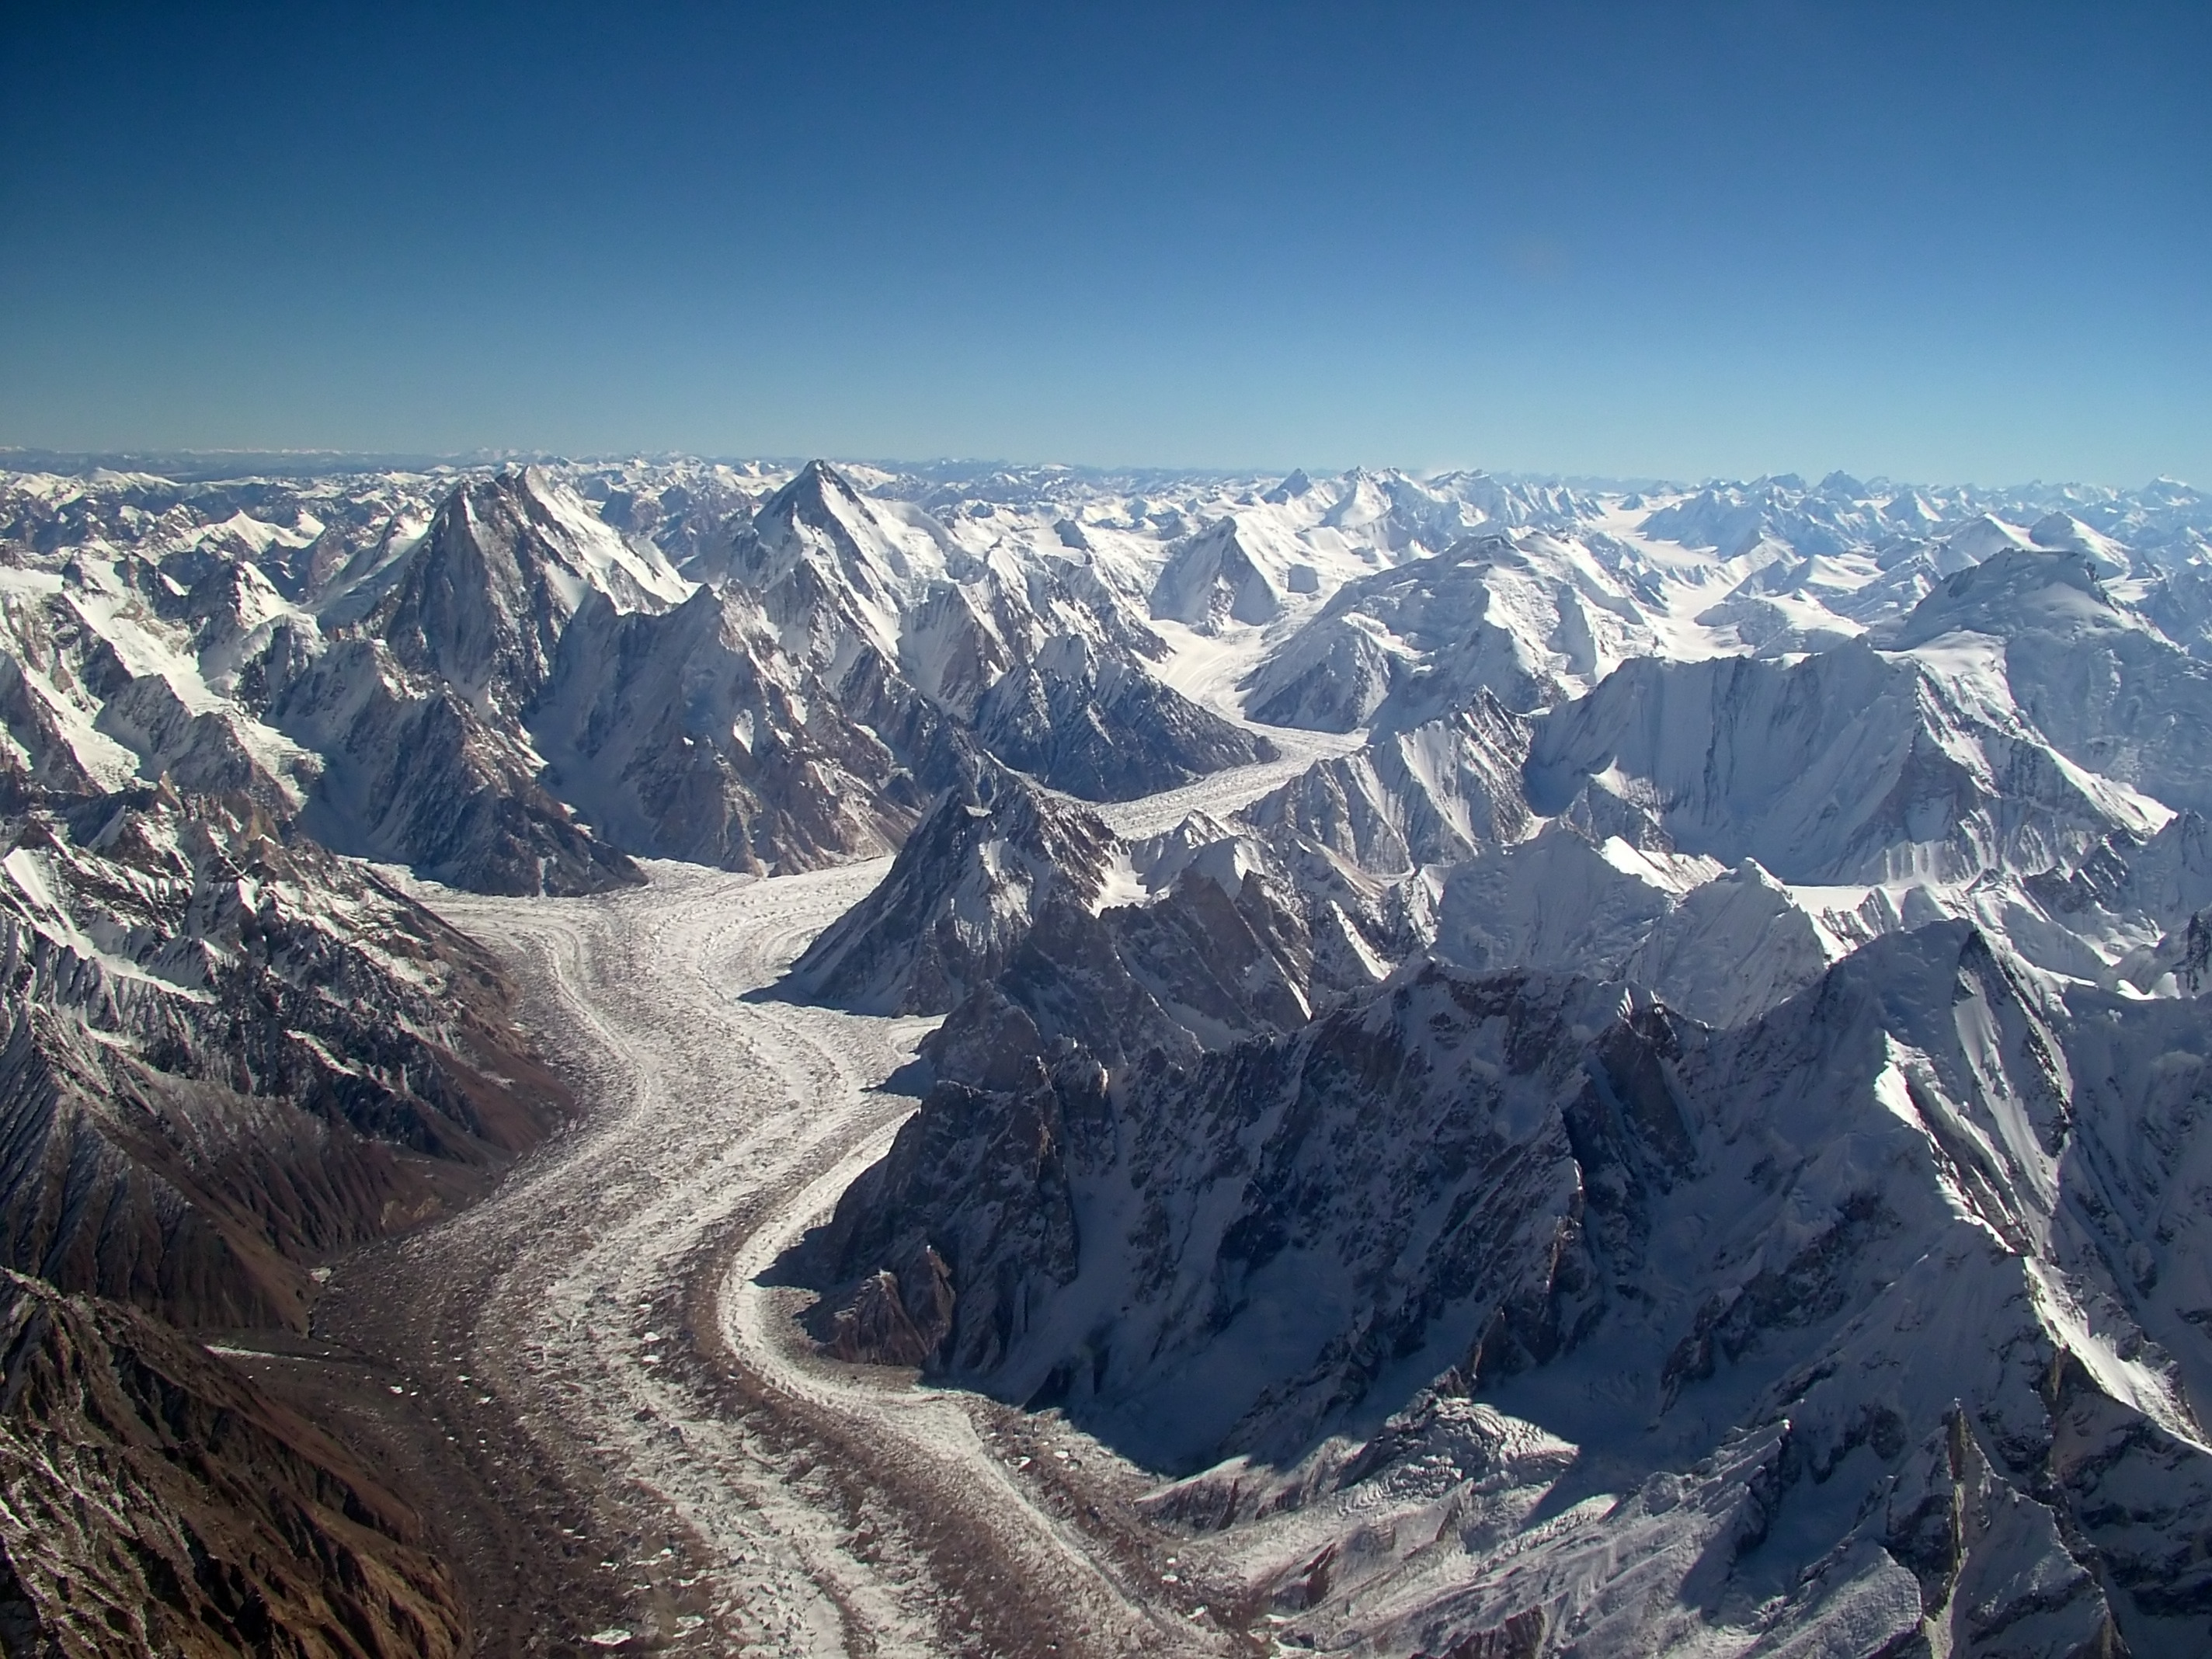
Goro II to Concordia: 9 kilometres, 4 to 5 hours, reaching 4,691 metres. The Baltoro bends northwest at the final promontory before Concordia and as you round the bend, four 8,000-metre peaks fill the view: K2 north, Broad Peak northeast, Gasherbrum I and II east. This is Concordia, the finest mountain viewpoint accessible to non-technical trekkers anywhere on Earth. Camp at the glacier junction. K2 and Broad Peak are your constant skyline from Concordia. The scale of Broad Peak's west face, the route you will climb, is visible in full profile from the camp. The route is a logical line up the broad snow face but it is also 3,000 metres of sustained elevation gain from base camp.
Day 11: Goro II to Concordia
Distance: 14 km | Altitude: 4,600 m | Accommodation: Campsite

Concordia to Broad Peak Base Camp: 8 kilometres up the Godwin-Austen Glacier, gaining 210 metres to 4,900 metres, approximately 2.5 to 3 hours. Base camp occupies the same general moraine area as K2 Base Camp and the two are within walking distance of each other. From Broad Peak Base Camp, K2 fills the entire northern view. Broad Peak rises directly above to the northeast, its west face and northwest ridge in full profile above the camp. The start of the climbing route is visible from the tent door: lower rock buttresses giving way to snow, the broad snow field of the west face, and the ridge leading to the summit plateau.
Base camp at 4,900 metres is home for the next 33 days. The cook team sets up the full kitchen and mess tent. Sleeping tents are pitched for each client and for the support staff. A toilet tent is established downwind. The communications antenna goes up and the satellite forecasting subscription is activated. The first base camp evening is for eating, drinking, and orientation. Your guide runs through the rotation schedule for the first time in detail: days 13 to 14 rest at base camp, days 15 to 19 first rotation to Camp II, days 20 to 21 rest, days 22 to 25 second rotation to Camp III, days 26 to 28 rest, then the summit push window.
Day 12: Concordia to Broad Peak Base Camp
Altitude: 4,900 m | Accommodation: Base Camp
Days 13 to 15 at base camp: equipment setup, medical assessment, rest, and final acclimatization at 4,900 metres before the first rotation begins. The first 3 base camp days are not for climbing. They are for your body to stabilise at the new altitude, for the guide to assess each climber's condition, and for the expedition infrastructure to be fully operational before anyone goes above base camp. Blood oxygen saturation is measured for each climber morning and evening. Resting heart rate is recorded. The guide conducts a structured physical assessment on day 14: rope ascending drills with a jumar, crampon walking on any available snow near camp, ice axe self-arrest demonstration. Day 15 is final preparation: confirm personal oxygen supply (if using oxygen), double-check crampon fit, review Camp I route with guide and examine weather forecast for the rotation window.
Day 13: Base Camp - Equipment Setup and Rest
Altitude: 4,900 m | Accommodation: Base Camp
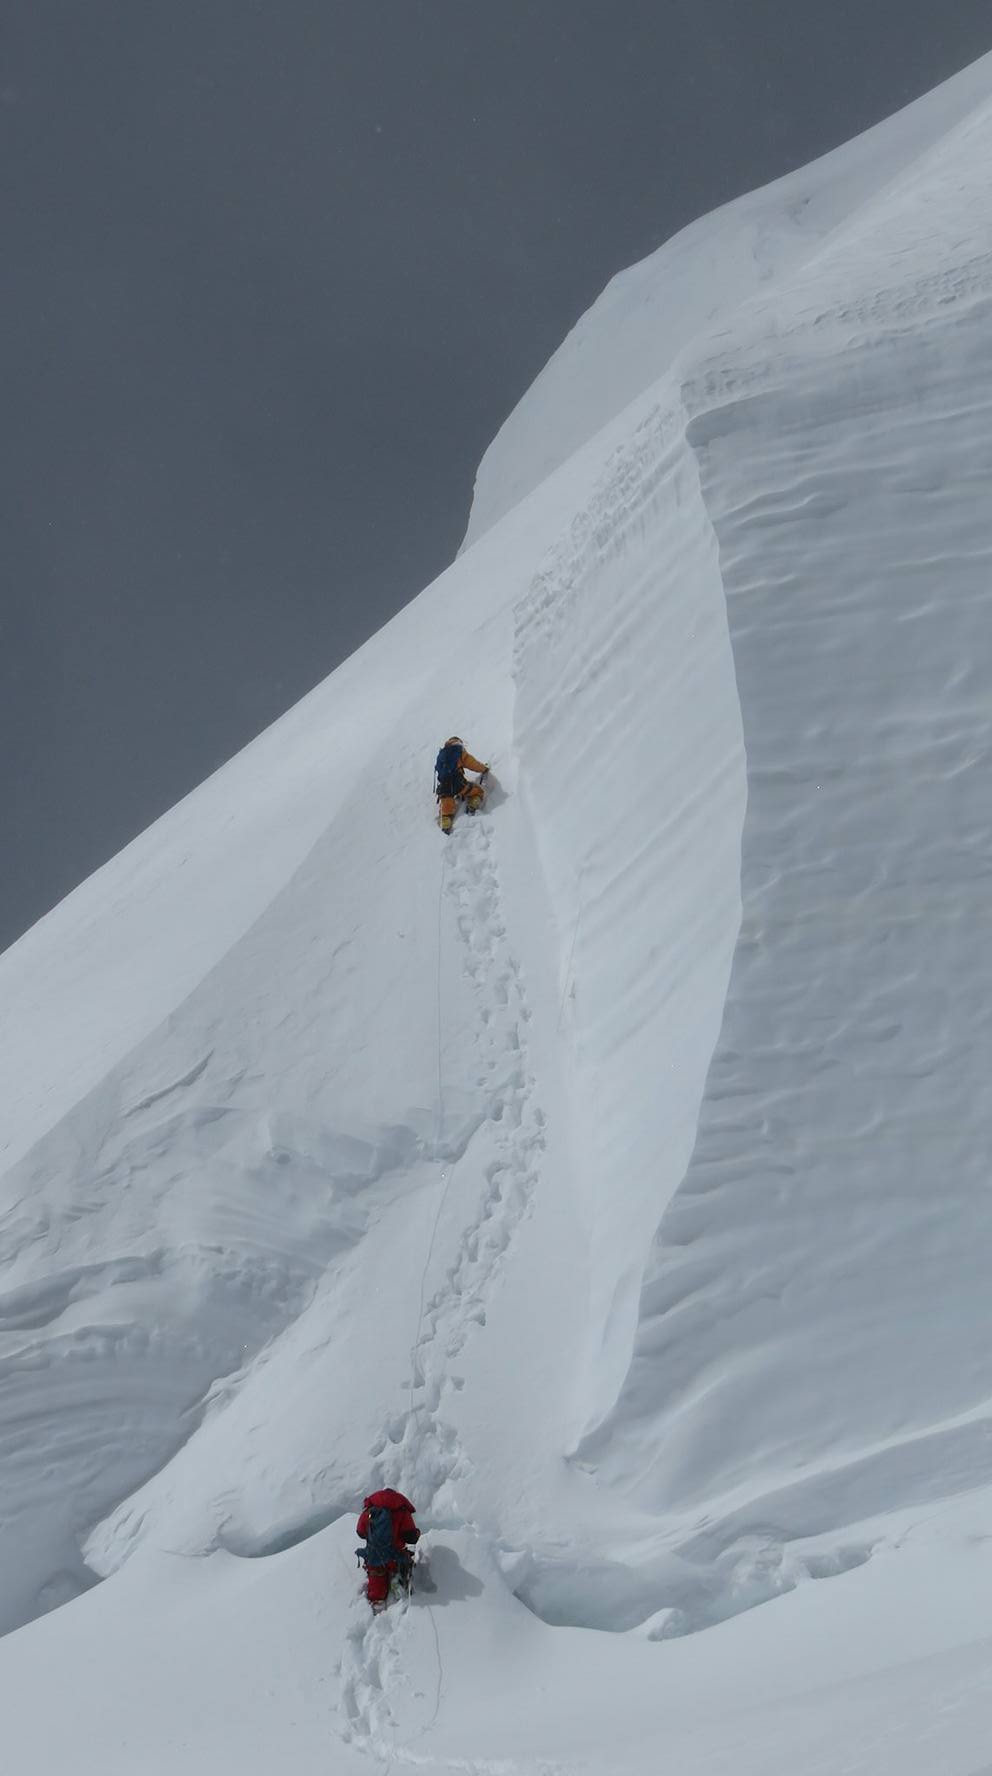
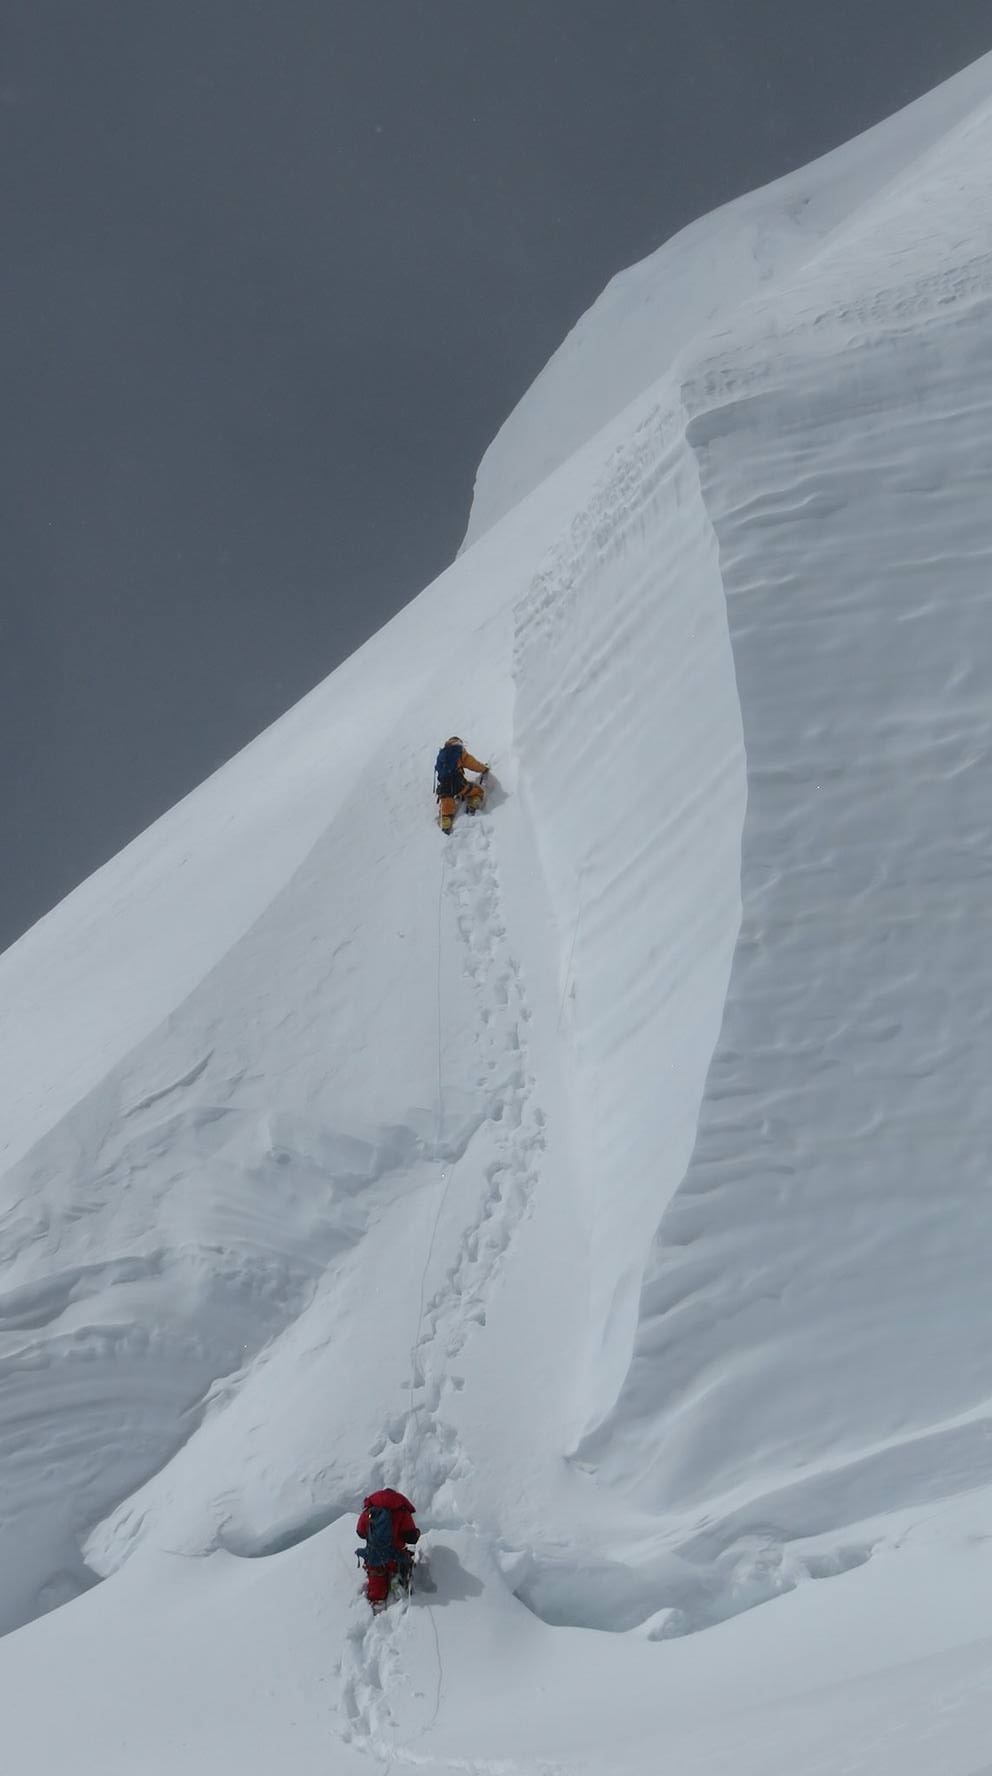
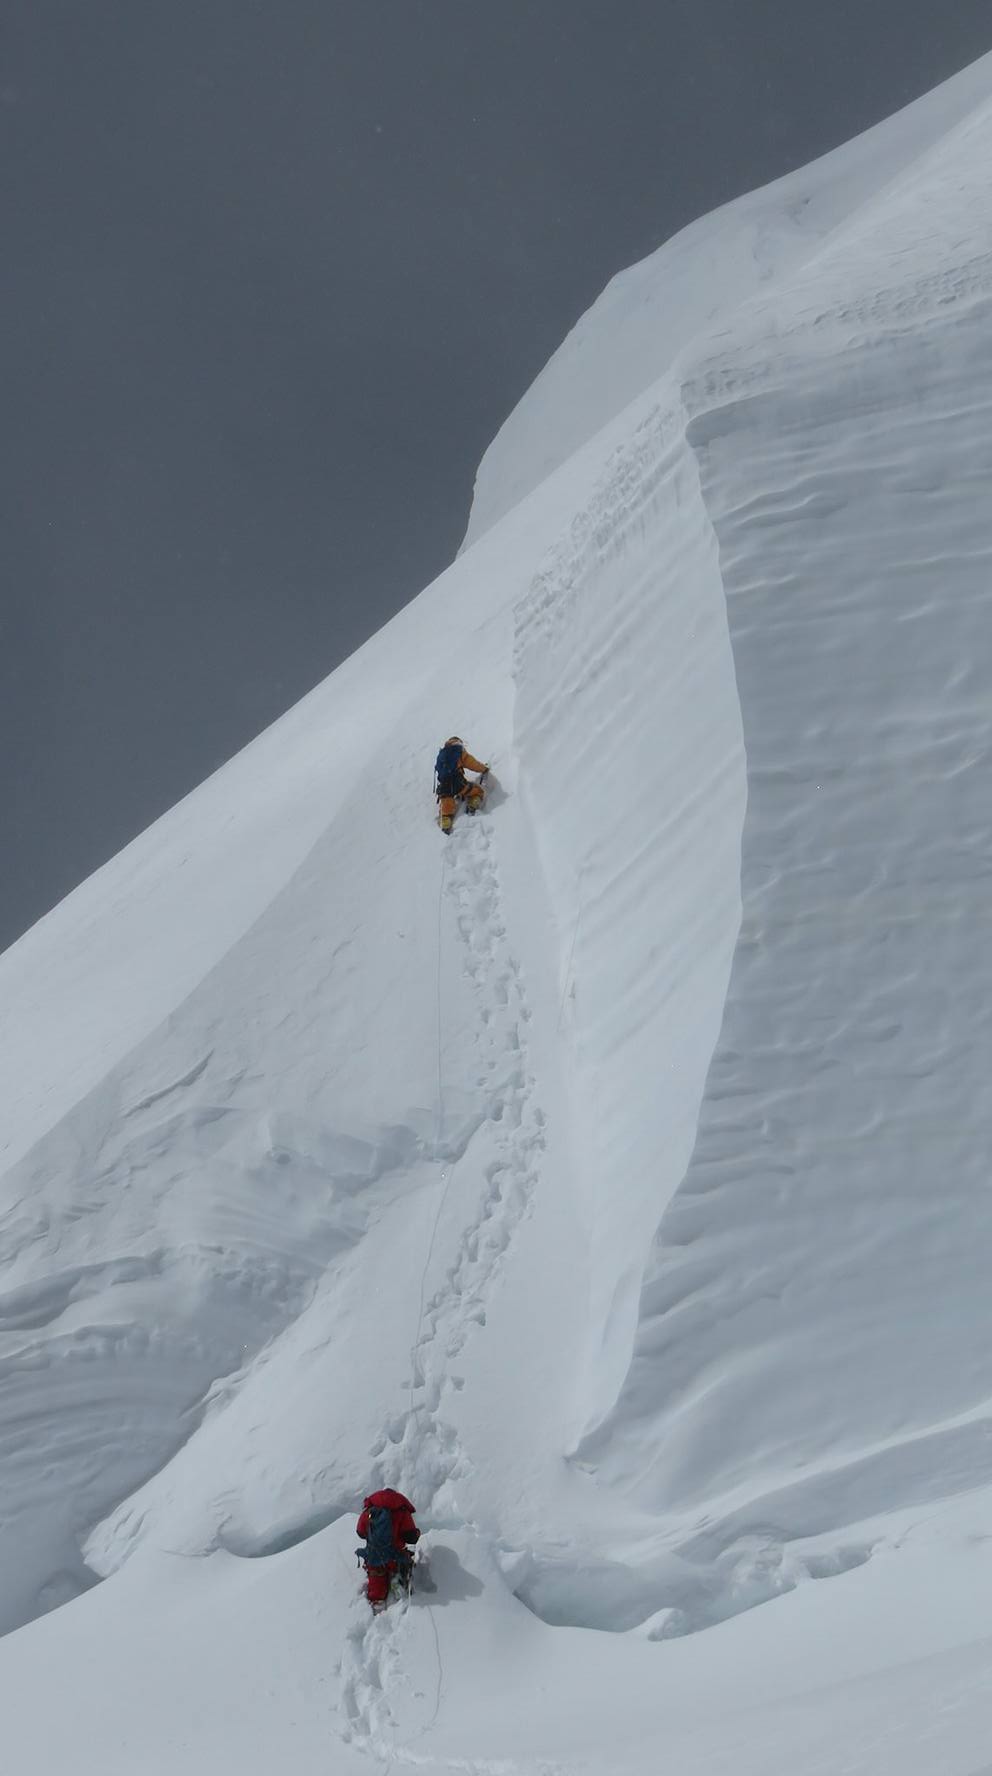
First rotation: base camp to Camp I at 5,900 metres, Camp I to Camp II at 6,500 metres, and back to base camp. Camp I is reached in 3 to 5 hours from base camp via the lower west face. The terrain above base camp is initially rocky moraine giving way to snow and ice on the main face. Camp I at 5,900 metres sits on a snow platform with space for 4 to 6 tents. The view from Camp I back down to base camp and across to K2 directly opposite is one of the finest high camp perspectives in the Karakoram. Camp II at 6,500 metres is a further 4 to 6 hours above Camp I on steeper snow terrain. The route between Camps I and II on Broad Peak is generally straightforward on the west face without the severe rock technical sections found on the lower section of K2's Abruzzi Spur. Fixed ropes are in place on the steeper sections. Spend 1 to 2 nights at Camp II before descending to base camp for the rest period.
Day 14: Base Camp - Rest and Acclimatisation
Altitude: 4,900 m | Accommodation: Base Camp
Days 20 and 21 are rest days at base camp after the first rotation. Two full days of rest and recovery at 4,900 metres after spending nights at 5,900 and 6,500 metres. The descent itself is an important physiological event: returning to 4,900 metres from 6,500 metres allows faster recovery than resting at altitude would permit. Eat as much as possible. Caloric expenditure on the first rotation under load is high and most climbers return with a meaningful deficit. Hydrate fully. The guide reviews rotation performance with each climber individually during these rest days. Any technique issues identified on the first rotation are addressed with practical drills in camp before the second rotation begins.
Day 15: Base Camp - Final Preparation
Altitude: 4,900 m | Accommodation: Base Camp
Second rotation: base camp through Camps I and II to Camp III at 7,100 metres. This is the critical acclimatization push into the Death Zone above 7,000 metres. The route above Camp II to Camp III at 7,100 metres traverses increasingly steep snow and mixed terrain on the upper northwest ridge. The ridge narrows above 6,800 metres and becomes exposed on both sides. Fixed ropes are in place on the exposed sections. Camp III at 7,100 metres is a small platform on the ridge with space for 2 to 3 tents. From Camp III the summit plateau is visible above: the broad snow field that gives Broad Peak its name, curving up and east toward the Main Summit at 8,047 metres. Spend 1 to 2 nights at Camp III before descending all the way to base camp.
The Camp III experience at 7,100 metres is qualitatively different from anything below it. In the Death Zone the body begins to deteriorate even with rest. Sleep at 7,100 metres is fragmented and physiologically less restorative than sleep at base camp. Appetite is minimal. Every movement requires conscious effort. The purpose of this rotation is acclimatization exposure, not summit attempt. Leave Camp III before deterioration progresses and descend fully to base camp. The physiological gains from 1 to 2 nights at Camp III will be retained in your blood and muscle tissue for the summit push.
Day 16: First Rotation - Base Camp to Camp 1 (5,900 m)
Altitude: 5,900 m | Accommodation: Camp 1
Days 26 to 28: rest days at base camp after the second rotation. Three full days of recovery before the summit push window opens. This is the most important rest period of the expedition. You are fully acclimatized from the Camp III rotation. Physical rest now builds the energy reserve that the summit push will draw on. Sleep as much as possible. Eat maximum caloric intake. Perform no significant physical exercise during these three days. The guide monitors weather forecasts daily and will notify the team when a multi-day stable weather window is identified. The summit push begins within 24 to 48 hours of the window opening.
Day 17: Camp 1 - Rest and Higher Reconnaissance
Altitude: 5,900 m | Accommodation: Camp 1
Weather monitoring day. Base camp, tent, food, tea, and forecast review. The meteorological service provides 72-hour and 5-day summit-level wind and precipitation data. The expedition leader and guide review every morning and evening forecast. Broad Peak's summit push requires a minimum 3-day stable window: summit day requires winds below 25 kilometres per hour at 8,000 metres. When the forecast shows this window, the summit push begins immediately. Mentally and physically you are ready to move on 24 hours notice. Gear is packed and staged. Oxygen systems (if using) are charged and ready. The question is only weather.
Day 18: Camp 1 to Camp 2 (6,500 m)
Altitude: 6,500 m | Accommodation: Camp 2
Summit push day 1: base camp to Camp I at 5,900 metres. Leave base camp at dawn. You have climbed this section twice during rotations and know every metre of it. The acclimatization gained on two rotations makes this ascent faster than either rotation climb. Arrive at Camp I in early afternoon. Hot food and drink from the cached Camp I food supply. Rest thoroughly this afternoon and evening. Tomorrow is the long Camp I to Camp II section. Weather check on arrival at Camp I. If conditions have changed and the summit window is closing, the guide may call a retreat to base camp to wait. If weather holds, sleep by 7 PM and leave for Camp II by 5 AM.
Day 19: Camp 2 to Base Camp - End of First Rotation
Altitude: 4,900 m | Accommodation: Base Camp
Summit push day 2: Camp I at 5,900 metres to Camp II at 6,500 metres. Leave at 5 AM, arrive at Camp II by mid-afternoon. At 6,500 metres you are well above the altitude where normal acclimatization compensates for altitude stress. Movement is deliberate and measured. Hot food cooked in the tent at Camp II. Each climber and their support climber share a tent. The expedition leader confirms weather at Camp II by satellite phone with the forecasting service. If summit conditions remain favourable for the next 48 hours, proceed to Camp III tomorrow. If the window is closing, the decision on whether to push to Camp III regardless or return to base camp is the guide's call. Trust the guide's judgement. The summit of Broad Peak is a worthy objective but not a reason to take unnecessary risks.
Day 20: Base Camp - Rest
Altitude: 4,900 m | Accommodation: Base Camp
Summit push day 3: Camp II at 6,500 metres to Camp III at 7,100 metres. Leave Camp II at 5 AM. The ridge section between Camp II and Camp III is the most technically demanding terrain of the northwest ridge route, with exposure on both sides and steep snow requiring front-pointing technique with crampons. Arrive at Camp III by midday. Full afternoon rest at Camp III. The guide sets the summit departure time based on conditions and the distance to the summit: typically midnight to 2 AM. Sleep by 5 PM if possible. Eat as much as your altitude-suppressed appetite allows. Check oxygen systems. The summit is above you. In 6 to 12 hours you will either be on it or retreating from it.
Day 21: Base Camp - Rest
Altitude: 4,900 m | Accommodation: Base Camp
Summit day: Camp III at 7,100 metres to the Broad Peak Main Summit at 8,047 metres and return. Departure at midnight to 2 AM. The summit gains 950 metres from Camp III in a push that takes 8 to 12 hours round trip to the summit alone. The route from Camp III follows the northwest ridge to the pre-summit plateau, crosses the North Summit at approximately 8,000 metres, traverses the summit plateau east, and reaches the Central Summit before the final short rise to the Main Summit at 8,047 metres. The plateau traverse is the distinguishing feature of Broad Peak's summit: you do not simply climb a single summit pyramid but traverse a broad snow and mixed terrain high above the Baltoro for approximately 400 metres. Wind on the plateau can be severe even when base camp and lower mountain conditions appear stable.
The view from Broad Peak's summit at 8,047 metres is one of the most extraordinary in the Karakoram. K2 is directly to the north at a distance of approximately 8 kilometres. The perspective from Broad Peak is the only position on any 8,000-metre peak in the world where K2 appears as an almost equal-height neighbour rather than a distant colossus. Gasherbrum I and II are visible to the east. The Baltoro Glacier stretches southwest to the horizon. The summit day return follows the same route: summit plateau to the northwest ridge descent, Camp III, and if conditions allow continue the descent to Camp II or even Camp I the same day. The guide makes the decision on descent depth based on team condition and remaining daylight.
Day 22: Second Rotation - Base Camp to Camp 1
Altitude: 5,900 m | Accommodation: Camp 1
Descent from Camp III (or Camp II if previously reached) back to base camp. The physical effort of descending after a summit day is significant. Fatigue from the 12 to 20 hour summit day carries over directly. Move deliberately on every fixed rope section. Most accidents on Broad Peak occur on descent, when exhaustion reduces the precision of crampon placement and fixed rope technique. Rest completely at base camp on arrival. The expedition is finished or nearly finished at this point regardless of summit outcome. Eat, drink, and sleep.
Day 23: Camp 1 to Camp 2
Altitude: 6,500 m | Accommodation: Camp 2
Base camp rest and celebration day. The summit push is behind you. If the summit was reached, the celebration is genuine and earned. If turned back by weather or physical limits, the debrief with your guide is honest and constructive. Both outcomes are legitimate results of a well-managed expedition. Either way, you have lived and climbed at over 7,000 metres on the 12th highest mountain on Earth for 35 days. That is not a small thing.
Day 24: Camp 2 to Camp 3 (7,100 m)
Altitude: 7,100 m | Accommodation: Camp 3
Broad Peak Base Camp to Concordia: 8 kilometres descending 210 metres southwest down the Godwin-Austen Glacier. Base camp is struck, porter loads are assembled, and the Baltoro return begins. Concordia at 4,691 metres is the last view of both K2 and Broad Peak from the glacier junction. Most climbers on the return spend time at Concordia looking back at Broad Peak's summit, the plateau they crossed, and the northwest ridge they spent five weeks climbing. Tonight at Concordia is the final high-altitude camp of the expedition.
Day 25: Descent Camp 3 to Base Camp
Altitude: 4,900 m | Accommodation: Base Camp
Concordia to Goro II: 9 kilometres along the upper Baltoro moraine heading southwest. The return walk to Goro II crosses the familiar terrain of the approach in reverse. Broad Peak and K2 are visible behind you over the right shoulder until the Baltoro bends at the Goro II camp. From Goro II onward the summit mountains drop below the horizon. The air at 4,270 metres is noticeably richer than Concordia after 35 days at or above base camp altitude. Appetite returns strongly. Sleep is deeper at this lower altitude.
Day 26: Base Camp - Rest
Altitude: 4,900 m | Accommodation: Base Camp
Goro II to Urdukas: 8 kilometres southwest. The Trango Towers reappear ahead as you head toward Urdukas. The view of Nameless Tower from the return direction is different from the approach: sun lights the west face in afternoon rather than the east face in morning. Camp at Urdukas on the rocky ledge above the glacier with the final panoramic view behind you toward Concordia and forward toward the lower Baltoro.
Day 27: Base Camp - Rest
Altitude: 4,900 m | Accommodation: Base Camp
Urdukas to Paiju: 14 kilometres, one of the longer return days. Paiju Camp at 3,400 metres is the return to green vegetation, the stream, and the last camp before Askole. By the time you reach Paiju the altitude is low enough that breathing is comfortable and energy levels have recovered from the expedition significantly. The cook team makes a special dinner for the Paiju return, the penultimate camp night of the expedition.
Day 28: Base Camp - Weather Monitoring
Altitude: 4,900 m | Accommodation: Base Camp
Paiju to Askole: 14 kilometres, the final glacier day. The terminal moraine, the wire bridge over the Braldu River, and the sandy path back to Askole retrace the approach exactly. The porter team is paid at Askole in a distribution managed by the sirdar. The jeeps are waiting for the drive back to Skardu. Arriving at Askole from a Broad Peak expedition with a summit if the weather allowed is one of the cleanest feelings available in mountaineering: the jeep, the hot tea, the drive back to normalcy.
Day 29: Summit Push - Base Camp to Camp 1
Altitude: 5,900 m | Accommodation: Camp 1
Drive Askole to Skardu: 4 to 5 hours through the Braldu Valley gorge road in reverse. Arrive in Skardu by early evening. Hotel room, hot shower, restaurant meal, phone calls home. The expedition is over. Tomorrow the Skardu to Islamabad flight takes you back to the capital and international connections.
Day 30: Camp 1 to Camp 2
Altitude: 6,500 m | Accommodation: Camp 2
Rest day in Skardu before the Islamabad flight. The Skardu hotel after 45 expedition days is a profound comfort. Eat as much as possible. Wash clothes. Walk in the bazaar. The expedition debrief with your guide covers the full season: summit conditions, route conditions, team performance, and any incidents or near-misses worth documenting for future expeditions. The Skardu rest day is also when the summit certificate application is submitted to the Pakistan Alpine Club if a summit was achieved. The certificate is issued by the Ministry of Tourism and takes several weeks to arrive.
Day 31: Camp 2 to Camp 3
Altitude: 7,100 m | Accommodation: Camp 3
Fly Skardu to Islamabad: 4 AM hotel departure for the early morning Pakistan International Airlines flight. The one-hour flight south to Islamabad provides the final aerial view of the Karakoram. Broad Peak and K2 may be visible from the right side of the aircraft in clear conditions. Transfer to hotel in Islamabad. Afternoon free for city exploration or rest before international departure.
Day 32: Summit Day - Camp 3 to Broad Peak Summit (8,047 m)
Altitude: 8,047 m summit | Accommodation: Camp 3
Islamabad, final day. The expedition leader runs the formal debrief and expense settlement. Permits, receipts, and documentation are finalised. International flight transfers are arranged. If you are continuing to other parts of Pakistan, your guide can provide recommendations and contacts for Lahore, the Hunza Valley, or the Kaghan Valley. If flying directly home, the airport transfer is arranged from your hotel. The 45-day Broad Peak expedition is complete.
Day 33: Descent Camp 3 to Base Camp
Altitude: 4,900 m | Accommodation: Base Camp
Departure from Islamabad. Transfer to Benazir Bhutto International Airport. International connections via Doha, Dubai, Abu Dhabi, or Istanbul cover most global destinations. The summit of Broad Peak or the attempt on it is behind you. The experience of living on a Karakoram glacier for 45 days and climbing to over 7,100 metres in acclimatization and further if weather allowed is the permanent record of this expedition.
Day 34: Base Camp - Rest and Celebration
Altitude: 4,900 m | Accommodation: Base Camp
Buffer and travel day. One additional day built into the schedule for flight delays, delayed porter payments, or any logistical issue on the exit from the expedition. If no contingencies arise, this day is used as additional rest time in Islamabad before international departure.
Day 35: Base Camp to Concordia
Altitude: 4,600 m | Accommodation: Campsite
You leave Broad Peak Base Camp and walk back to Concordia. The walk takes about four hours on familiar moraine terrain. Concordia feels different on the return. You have spent six weeks in this mountain world and leaving it has its own feeling.
Day 36: Concordia to Goro II
Altitude: 4,270 m | Accommodation: Campsite
From Concordia you walk back down the Baltoro to Goro II. The return route is the same path you walked on the approach. Walking downhill feels much easier after weeks at high altitude. The air gets noticeably richer as you descend.
Day 37: Goro II to Urdukas
Altitude: 4,050 m | Accommodation: Campsite
From Goro II you walk back to Urdukas. The Trango Towers reappear as you descend. The glacier is familiar terrain now. Urdukas Camp sits at 4,050 metres and feels warm compared to the high camps where you have been living. Good dinner tonight in the mess tent.
Day 38: Urdukas to Paiju
Altitude: 3,390 m | Accommodation: Campsite
From Urdukas you walk back down the Baltoro to Paiju Camp. The walk passes the Trango Towers one last time. Paiju green grass and the stream feel like a reward at the end of the day. Wash up and rest well tonight. Only one more trek day remains.
Day 39: Paiju to Askole
Distance: 22 km | Altitude: 3,015 m | Accommodation: Campsite
From Paiju you walk back to Askole village where the jeeps are waiting. The final glacier day ends where the expedition started on the ground. The four-hour jeep drive back to Skardu through Braldu Valley is rough but short compared to what you have been doing for six weeks.
Day 40: Drive Askole to Skardu
Altitude: 2,228 m | Accommodation: Hotel
Rest day in Skardu after arriving yesterday. Sleep late, eat well, and explore the town. The hot shower after the glacier will feel remarkable. Visit the bazaar and buy souvenirs. The expedition manager handles all the porter payment and official close-out paperwork today.
Day 41: Skardu - Rest
Altitude: 2,228 m | Accommodation: Hotel
You fly from Skardu back to Islamabad in the morning. The one-hour flight lands you back in the capital. From Islamabad, international flights depart throughout the day. If your flight is tomorrow, we arrange a hotel night. The expedition is officially complete.
Day 42: Fly Skardu to Islamabad
Altitude: 508 m | Accommodation: Hotel
Final day in Islamabad. If you have energy, visit the Pakistan Monument or Faisal Mosque. Otherwise rest at the hotel and prepare for the long flight home. Your guide accompanies you to the airport. The 45-day Broad Peak Expedition is finished.
Day 43: Islamabad - Final Day
Altitude: 508 m | Accommodation: Hotel
Buffer travel day. This day is built into the schedule to absorb any flight cancellations or delays between Skardu and Islamabad. If everything ran on time, you use this day as a final rest in Islamabad or depart early. Flexibility here means you never miss international connections due to mountain weather disruptions.
Day 44: Departure
Accommodation: Hotel if needed
Transfer to Islamabad International Airport for international departures. Our team provides airport assistance and ensures smooth departure logistics. The journey home from the Karakoram carries with it the satisfaction of having stood on one of the world's fourteen highest peaks and traversed one of the most remote mountain landscapes on the planet.
Meals: Breakfast if staying overnight
Day 45: Buffer / Travel Day
Accommodation: Hotel if needed
A final buffer day is built into the itinerary to account for potential flight delays between Skardu and Islamabad, which are common due to weather-dependent visual flight rules. This day ensures that international flight connections are not missed due to domestic airline delays. If the schedule has run smoothly and no buffer is needed this day can be used for additional rest, sightseeing, or early departure.
Meals: Breakfast if staying overnight
Highlights
- Summit Broad Peak at 8,047 metres, the 12th highest mountain on Earth, via the classic 1957 Austrian route on the west face and northwest ridge.
- Establish base camp at 4,900 metres directly adjacent to K2 Base Camp, with K2 as your constant backdrop throughout the expedition.
- Complete two acclimatization rotations to Camp III at 7,100 metres before the summit push, a systematic acclimatization programme designed for optimal physiological readiness.
- Walk the full Baltoro Glacier from Askole to Concordia alongside other international expeditions bound for K2, Gasherbrum I, and Gasherbrum II.
- Experience the wide summit plateau of Broad Peak, a distinctive high-altitude feature that requires crossing the North Summit before reaching the Main Summit at 8,047 metres.
- View K2 from altitude during the summit push, the most dramatic perspective of K2 available without actually climbing it, as Broad Peak's north ridge faces K2 directly across the Godwin-Austen Glacier.
- Work with a dedicated high-altitude support climber from Camp II through the summit day, with the option of supplementary oxygen from Camp III if required.
Included/Excluded
All accommodation (hotels in Islamabad and Skardu, base camp and high camp tents)
All meals from Day 1 to final departure day
Domestic flights Islamabad to Skardu return
Jeep transfers Skardu to Askole return
Pakistani government Broad Peak climbing permit
Liaison officer fee and accommodation
Certified high-altitude expedition guide
High-altitude porters (HAPs) for load carrying to high camps
Fixed ropes and anchors on the Northwest Ridge
Professional base camp cook and kitchen crew
Approach trek porters and their insurance and wages
Base camp equipment: mess tent, kitchen tent, solar panel, satellite communicator
Emergency oxygen, Gamow bag, and expedition medical kit at base camp
Airport and hotel transfers in Islamabad
International flights to and from Islamabad
Pakistan visa fee
Personal high-altitude climbing equipment (boots, crampons, ice axe, harness, etc.)
Personal sleeping bag and down suit
Personal porter for individual luggage on the approach trek
Travel and rescue insurance (mandatory, must cover above 8,500 m)
Tips for guides, cook, porters, and base camp staff
Supplemental personal oxygen bottles (available at extra cost)
Satellite phone rental
Expenses due to weather delays, flight cancellations, or early evacuation
Medical costs and evacuation fees
Alcoholic beverages
Things To know
Travel and Rescue Insurance
- Comprehensive insurance is mandatory for all participants, with no exceptions.
- Your policy must cover mountaineering above 8,500 metres altitude.
- It must include emergency helicopter rescue up to at least 6,000 metres and overland rescue above that altitude.
- Medical evacuation coverage of at least USD 200,000 is required.
- Provide a copy of your policy to World of Mountain at least 30 days before departure.
Personal Climbing Equipment
- All personal technical climbing gear must be brought by the participant.
- 8,000-metre rated double boots (Scarpa Phantom 8000, La Sportiva G2 Evo, or equivalent)
- Expedition down suit rated to -40C minimum
- Technical crampons, ice axe, harness, jumar, and descender device
- High-altitude sleeping bag rated to -30C or colder
- Expedition gloves with inner liner and outer mitten
- Polarised goggles and high-SPF glacier sunscreen
Altitude Sickness and Safety
- Altitude sickness is a genuine risk at all elevations above 3,500 metres.
- High-altitude pulmonary oedema (HAPE) and cerebral oedema (HACE) are life-threatening conditions that require immediate descent.
- Our guide carries dexamethasone, nifedipine, and a Gamow bag for emergency treatment at base camp.
- Never ignore symptoms including severe headache, confusion, loss of coordination, or difficulty breathing.
- Descend immediately if your guide or team doctor recommends it. Speed of descent saves lives.
Communication and Emergency Protocols
- A satellite communicator is maintained at base camp for emergency communication throughout the expedition.
- Mobile phone coverage ends before reaching Askole village.
- Inform family and friends of your estimated return date and emergency contact procedures.
- Daily weather forecasts are received via satellite from a professional meteorological service.
- Emergency evacuation routes and procedures are briefed by the guide on Day 1 at base camp.
Physical Preparation
- Begin a structured training programme at least 6 months before the expedition.
- Include long-distance running, cycling, and hiking with heavy loads (15-20 kg pack).
- Complete at least two multi-day treks above 4,000 metres in the 12 months before the expedition.
- Strength training for legs, core, and upper body supports movement on technical terrain.
- Consult a sports medicine doctor familiar with high-altitude physiology before the expedition.
Responsible Expedition Practices
- All expedition waste including human waste must be packed out from the mountain above base camp.
- Do not leave equipment, ropes, or rubbish on the mountain above base camp.
- Pay porters and local staff above the minimum government-set wage and always on time.
- Respect local Balti culture and religious practices in all villages on the approach trek.
- Do not collect rock, ice, or plant samples from the national park area.
FAQs
What experience is required to join this expedition?
You should have summited at least one 7,000-metre peak and have technical ice and mixed climbing experience above Alpine D grade. Experience with fixed rope ascending (jumar use) on steep ice terrain is essential because the Broad Peak northwest ridge has multiple fixed rope sections between camps. Broad Peak is frequently described as the most technically straightforward of the 8,000-metre peaks on the standard route, but straightforward at 8,000 metres still requires the same technical foundation as any serious alpine objective.
Prior experience on lower 8,000-metre peaks significantly improves your realistic probability of reaching Broad Peak's summit. The physiological demands of sleeping above 7,000 metres, using supplementary oxygen correctly, and managing the cumulative stress of a 45-day expedition are much better managed by a climber who has faced them before on Mera Peak, Island Peak, or a lower 8,000-metre objective. If this is your first venture above 7,000 metres, consult with us about additional preparatory expeditions before committing to Broad Peak.
Is Broad Peak suitable as a first eight-thousander?
Broad Peak is commonly cited as one of the better first 8,000-metre peaks because of the relatively straightforward technical character of the northwest ridge route, the absence of the severe objective hazards like the K2 Bottleneck serac band, and the wide summit plateau that gives the route a slightly more forgiving summit day character than narrow-ridged peaks like Annapurna or Makalu.
That said, death zone altitude at 8,047 metres is the same reality on Broad Peak as on any other 8,000-metre peak. The summit requires crossing the plateau from the North Summit to the Main Summit in conditions that can include severe wind. The summit success rate on Broad Peak is approximately 20 to 30 percent of all attempts. The fatality rate, while lower than K2 or Annapurna, is still significant. Treat Broad Peak as a serious mountaineering objective, not a stepping stone with reduced consequences.
What is the success rate on Broad Peak?
The overall summit success rate on Broad Peak across all attempts is approximately 20 to 30 percent. In guided commercial expedition format the rate varies significantly by season weather. In good weather years with stable July-August conditions, guided expedition success rates can reach 40 to 50 percent. In poor weather years with limited summit windows, success rates drop below 15 percent. The weather on the summit plateau is the primary determining factor, not guide quality or client fitness.
What is the altitude of the summit and the high camp?
The Main Summit is at 8,047 metres. Camp III, the high camp, sits at 7,100 metres. The summit push from Camp III gains 947 metres and typically takes 8 to 12 hours to the summit. The total vertical gain from base camp at 4,900 metres to the summit is 3,147 metres.
What climbing equipment do I need to bring?
The minimum required personal equipment for Broad Peak includes: double plastic mountaineering boots rated to minus 40 Celsius (not regular trekking boots), a 4-season down sleeping bag rated to minus 30 Celsius or colder, a full body mountaineering harness (not a trekking harness), crampons designed for mountaineering boots with front points (not strap-on walking crampons), a mountaineering ice axe 60 to 70 cm, a helmet rated for rock and ice impact, a jumar/hand ascender for fixed ropes, and a supplemental oxygen system if choosing to use oxygen.
Clothing must handle temperatures from plus 20 Celsius at base camp on a sunny afternoon to minus 25 Celsius or colder at Camp III overnight. The layering system must include a down suit or down jacket and trousers rated to extreme cold, and waterproof shell outerwear. Gloves require at least three layers: liner gloves, insulated mid-gloves, and heavy expedition mitts. Frostbite begins quickly at Camp III altitude and above in any gap in glove coverage.
Is supplemental oxygen used on this expedition?
Supplementary oxygen is not required on Broad Peak's northwest ridge route and many guided expedition clients choose to attempt Broad Peak without it. The decision is individual and should be made in consultation with your guide based on your performance on the second rotation to Camp III. If your oxygen saturation at Camp III is significantly below 80 percent at rest, oxygen supplementation on the summit push is strongly advisable regardless of your original intention. We carry oxygen equipment for all clients and it is available from Camp III onward for anyone who needs or wants it.
How are high camps established?
High camps are established during the acclimatization rotations. On the first rotation the expedition fixes ropes on the technically demanding sections between base camp and Camp II and establishes Camp I and Camp II with lightweight expedition tents (typically Black Diamond Bombshelter or similar 4-season tents rated for severe wind). Camp II is stocked with food, fuel, and oxygen supplies cached on the first rotation. On the second rotation Camp III is established with the same high camp tents and stocked for the summit push.
All high camp tents and equipment are provided by the expedition and remain in place throughout the season. Clients do not carry tent hardware on the rotation climbs. The expedition employs high-altitude workers (HAP, high-altitude porters) who carry loads to Camp I and Camp II during the rotations alongside the guides and clients.
What happens if I cannot reach the summit?
If you cannot reach the summit, the expedition supports a safe descent from wherever your high point was. There is no penalty or additional cost for not summiting. The expedition fee covers the full 45-day programme regardless of summit outcome. Your guide's professional obligation is to get you safely to the highest point your condition, the weather, and the route conditions permit, and then to get you safely back to base camp. The summit is the best possible outcome of a safe expedition, not the minimum requirement.
What is the weather like above 7,000 metres?
Above 7,000 metres the Karakoram weather pattern is dominated by the jet stream in early season and by residual monsoon moisture in late July and August. Summit-level winds on Broad Peak during the established season window (June to August) typically alternate between calm periods of 2 to 4 days and windy periods of 3 to 7 days. The calm periods are the summit windows. Summit-level temperatures range from minus 20 to minus 30 Celsius in the summit window period with wind chill potentially bringing effective temperatures to minus 50 Celsius in strong wind. Planning the summit day clothing for the most extreme conditions within the forecast window, not the median conditions, is the correct approach.
Is rescue possible at high altitude?
Helicopter evacuation from K2 area base camp at 4,900 metres is possible in good weather and has been successfully executed in previous seasons. The helicopter ceiling for rescue operations in the Karakoram is approximately 5,500 metres in optimal conditions. From base camp a helicopter evacuation is realistic. From Camps I through III helicopter evacuation is extremely difficult or impossible and a self-rescue or assisted descent is the only option. All climbers and guides understand this limitation before the expedition begins. Evacuation insurance covering helicopter rescue in Pakistan is required for all expedition participants.
What permits are required and are they included?
The Broad Peak climbing royalty fee (permit) is included in the expedition price. A government liaison officer salary is included. The liaison officer is required by Pakistani law for all expeditions to peaks above 6,000 metres and accompanies the expedition from Islamabad to base camp and throughout the permit period.
Can I join as a solo climber?
Yes, solo climbers join the group expedition. The group is typically 4 to 8 climbers plus guides and support staff. Each climber is assigned a dedicated high-altitude support climber from Camp II onward. If you want a completely private expedition with your own exclusive guide team and no other clients, contact us for a private expedition quotation. Private expeditions require a minimum team of 2 paying clients for financial viability on Broad Peak.
Tour Location
Karakoram, Gilgit-Baltistan, Pakistan
Reviews
0/5
Not Rated
Based on
0 review
Excellent
0
Very Good
0
Average
0
Poor
0
Terrible
0
No Review
11%
from
$8,500
$7,500
from
$8,500
$7,500